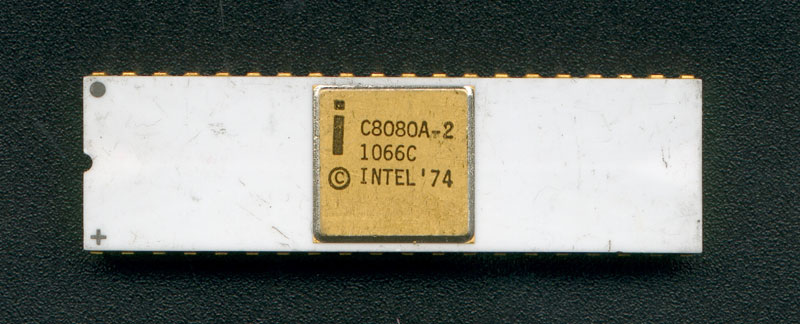
I started down this journey a bit randomly. I was researching how the Game Boy uses memory bank switching when I came across this video1 in which the author attempts to emulate the Game Boy. Since the Game Boy’s CPU is a hybrid of the Intel 8080 and Zilog Z80 processors, they start out by implementing the 8080’s instructions. Though my initial intent was to learn about memory bank switching, seeing this inspired me to set off and create an 8080 emulator.
I lucked out in my choice to emulate the 8080. It turns out that retro CPUs are orders of magnitude simpler to understand than modern ones and that the 8080 is one of the earliest. As a byproduct of this simplicity, their documentation are detailed while remaining reasonable in size (i.e. readable). (Contrast the less than 300 pages of the 8080 User’s Manual with the almost 5000 pages of Intel’s current 64 and IA-32 Developer’s Manual!)
Building
The 8080’s User’s Manual has a section which explains what each instruction does. I used it in conjunction with the Programming Manual to write equivalent functionality in Python. For example, here’s the description for the JMP instruction:
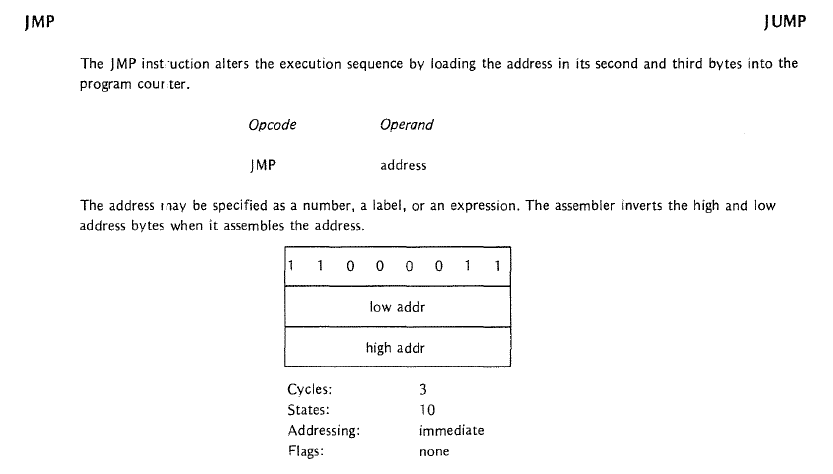
And the corresponding code:
def JMP( self ):

    byte2 = self.fetchInstruction()
    byte3 = self.fetchInstruction()

    address = self.toWord( byte2, byte3 )
    self.register_PC.write( address )
I rolled my own 8080 assembler as I couldn’t figure out how to use those I found by searching the web.2 This was in hindsight a questionable decision as when it came to debugging, I was never quite sure whether it was the emulated CPU logic that was at fault, the assembler, or both! On the other hand, building the assembler helped me understand how the 8080 manipulates memory and exposed me to assembler concepts such as directives and macros. The assembler is very bare-bones and should only be used as a last resort.
There were three areas that had me scratching my head for some time: the carry/borrow flag, I/O communication, and terminals.
Carry/Borrow Flag
A kind soul on StackExchange put me out of my misery.
I/O Communication
It took a while to wrap my head around how the 8080 uses the IN and OUT instructions to communicate with the outside world. Sergey Malinov’s Minimal 8085 Single Board Computer project was very helpful. Seeing how he wired the 8085 processor to the USART in his computer helped clarify how the IN and OUT instructions relate to physical communication. (The 8085 is a refined version of the 8080 processor.) His well commented code for printing characters using the USART was equally helpful. An email response from Spencer of the RC2014 further helped my understanding.
Conceptually,
- The
INcommand (IN portNumber) signals the specified I/O device that the 8080 wishes to receive a byte. Once the I/O device places the byte on the databus, the 8080 transfers the byte into its A register. - The
OUTcommand (OUT portNumber) signals the specified I/O device that the 8080 wishes to send a byte. The 8080 also places the contents of its A register onto the databus so that the I/O device can read it.
Physically,
- The I/O port number is placed on the 8080’s address bus
- In the 8085, the
IO/_Mpin is then pulled high to indicate that the CPU wishes to communicate with an I/O device. Each I/O device checks whether the port number on the address bus refers to it. - At the same time, either the
_RDor_WRpin is pulled high depending on whether the 8085 wants to read in a byte or send out a byte. - The selected I/O device then proceeds to either send or receive a byte. To send a byte, the I/O device places it on the 8085’s databus. To receive, the I/O device reads it from the 8085’s databus.
- A similar procedure happens in the 8080, albeit with the use of external supporting circuitry.
Terminals
Learning what terminals were took some time. What helped was a history lesson on ‘dumb’ terminals such as the Teletype and realizing that the use of the word ‘terminal’ to refer to a shell is a gross misnomer!
I applied what I learned about the 8080’s I/O communication to design how the emulated terminal (see terminal.py) interfaces with the emulated 8080. To keep things simple, I didn’t bother emulating the IO/_M, _RD, and _WR signals.
8080 I/O code:
def IN( self ):

    byte2 = self.fetchInstruction()  # get port number. Used to select IO device
    self.addressBus = byte2

    data = self.receive()  # simulate
    self.write_A( data )

def OUT( self ):

    byte2 = self.fetchInstruction()  # get port number. Used to select IO device
    self.addressBus = byte2

    data = self.read_A()
    self.transmit( data )

...

def receive( self ):  # IN command

    # Get data directly from IO device

    ioDevice = self.ioDevices[ self.addressBus ]

    data = ioDevice.transmit()

    return data

def transmit( self, data ):  # OUT command

    # Send data directly to IO device

    ioDevice = self.ioDevices[ self.addressBus ]

    ioDevice.receive( data )
Terminal I/O code:
def transmit ( self ):

    # Send data to CPU

    if len( self.keyBuffer ) > 0:

        return self.keyBuffer.pop()

    else:

        return 0

def receive ( self, data ):

    # Receive data from CPU

    self.displayCharacter( data )
Running
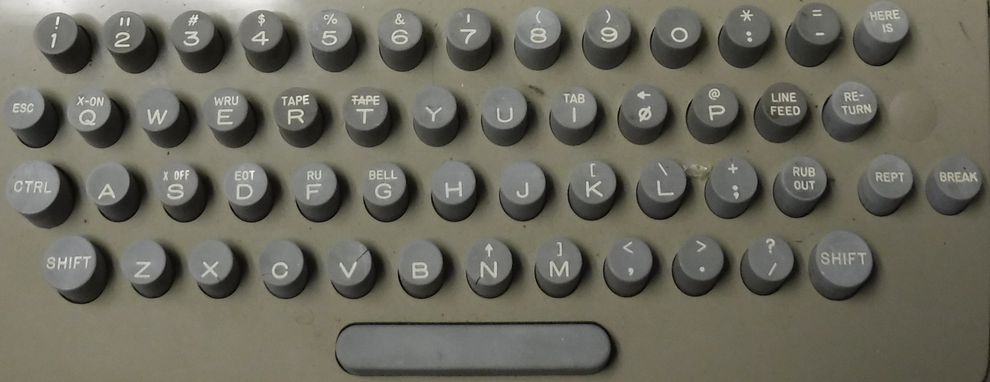
I got the idea to run Tiny Basic on the emulator from Sergey’s writeup. Tiny Basic was written back in the day when keyboards looked like the following image. The (carriage) return key literally moved the print head to the start of the current line!
And programming looked like this video:
As such, there were some minor outdated references that had to be addressed.
The Tiny Basic code references the RUBOUT key (ASCII code 0x7F). In the code, the key behaves like the modern BACKSPACE key (ASCII code 0x08). I replaced all instances in the code accordingly.
The Tiny Basic code also uses the carriage return character (ASCII code 0xD, character \r) to mark the end of user input. Contemporary computer programs use the line feed character (ASCII code 0xA, character \n) for this purpose. The correct solution would have been to change all instances in the Tiny Basic code accordingly. However, the code also uses the carriage return character to mark the end of a string. Rather than trying to sort one from the other in the code, I opted for the simpler solution of changing the emulated terminal instead. When you press the ENTER key, the terminal sends the \r character that the Tiny Basic code expects instead of the \n character.
I also modified the input and output portion of the Tiny Basic code to work with my simple terminal. The original Tiny Basic code was written for a computer that uses the Intel 8251 USART for communication (see Sergey’s example USART code). As such it has 8251 specific code which I commented out and replaced with the following:
TERMPN  EQU  0   ; IO port number of terminal
...
OUT  TERMPM      ; send a character
...
IN   TERMPN      ; receive a character
Fast forward a lot of debugging, and here’s a video of the emulator running Tiny Basic!
Here’s another video of the emulator running Euphoria (a game written for Tiny Basic). The game finishes ‘loading’ at 3:11. Note, I did not type all of that code - that would be crazy. Instead I made my terminal a little ‘smart’ in that it can read characters from a specified file into its buffer.
I hoped to demonstrate more games. However, it turns out that there are multiple versions of Tiny Basic and a program written for a particular version will not work on other versions if it uses functions they have not implemented. Euphoria was the only game I could find that runs on this version of Tiny Basic. Coding some additional demos in either Tiny Basic or 8080 assembly crossed my mind, but ultimately wasn’t worth the effort.
Debugging
Debugging assembly code that you haven’t written is hard. It is not immediately obvious what a series of instructions seeks to accomplish. (If you have to debug assembly code that is not commented, I don’t know who you wronged in a past life but this is clearly your penance.) Even with all the modern tools I have at my fingertips and the reasonably commented source code I was using, debugging was still a pain. I can’t imagine what it was like back in the days of the Teletype. Here’s a video of what debugging with the emulator looked like:
Adding the abilities to step forwards and backwards through the currently executing program, and to set breakpoints was not optional! It was the only way to understand what a series of assembly instructions accomplished.
As mentioned earlier, errors were either from my CPU logic, assembler, or both. I came across a testbench designed to test every instruction in the 8080 which helped greatly in isolating CPU logic errors.
Moving forward
Future projects for the 8080 emulator include:
- Getting it to run CP/M
- Modifying the terminal so that it can draw pixels. Currently it treats all the bytes it receives as character data. One approach would be to modify it to use two registers, one for receiving command bytes, and the other for data bytes. The command register can then be used to differentiate between a
drawCharacteranddrawPixelcommand.
Takeaways
Creating the 8080 emulator led to an interesting journey. Along the way, I learned about some of the approaches used to design processors and microcontrollers such as the Intel 8085, Intel 8051, MOS 6502, Zilog Z80, Motorolla 68000, and Atmel Atmega328. All this will help towards my Homebrew Computer.
Code
Everything is on Github. See the README for how to use the emulator if you wish to give it a go.
Links
- 8080 User’s Manual
- 8080/8085 User’s Manual
- 8080/8085 Programming Manual
- Tiny Basic article
- Sergey’s Minimal 8085 Single Board Computer
- Michael Steil’s architecture talks
- Scott Baker’s Z80 videos. Many of the projects shown can be done with the 8080.
- Interrupts on the 8080 (and use of the RST instruction)
- Reverse engineering uncommented assembly code. (It is possible with the right tools.)
Notes
1It seems the video is no longer available.
2The Pretty 8080 Assembler is an exception to this. Unfortunately it performs only a single pass and the Tiny Basic code I was using needs two passes for all its values to be defined.