I wanted to learn how to etch PCBs at home. (Read as too cheap to pay someone else to do it). I was pleasantly surprised by the results.
- Board prep -
I lightly sanded the copper layer with 800 grit sandpaper (it was the finest grit I had on hand) to remove the oxide layer. I then rinsed it with water and wiped with isopropyl alcohol.
- Transfer -
I used the “printer toner and iron” method to transfer the design onto the copper. (Why - cheap). Steps:
- Tape magazine paper onto regular paper
- Print your design onto said magazine paper using a laser printer
- make sure to mirror (vertical flip) the design before printing. I forgot to do this.
- when printing, select the highest resolution (dpi) your printer offers
- Place the paper on top of the copper board
- Iron it
- this transfers the toner to the copper board
- I had my iron set to the highest temperature but ymmv
When it seemed like the toner had transfered, I soaked the board in water then gently peeled off the magazine. See this video for an example.
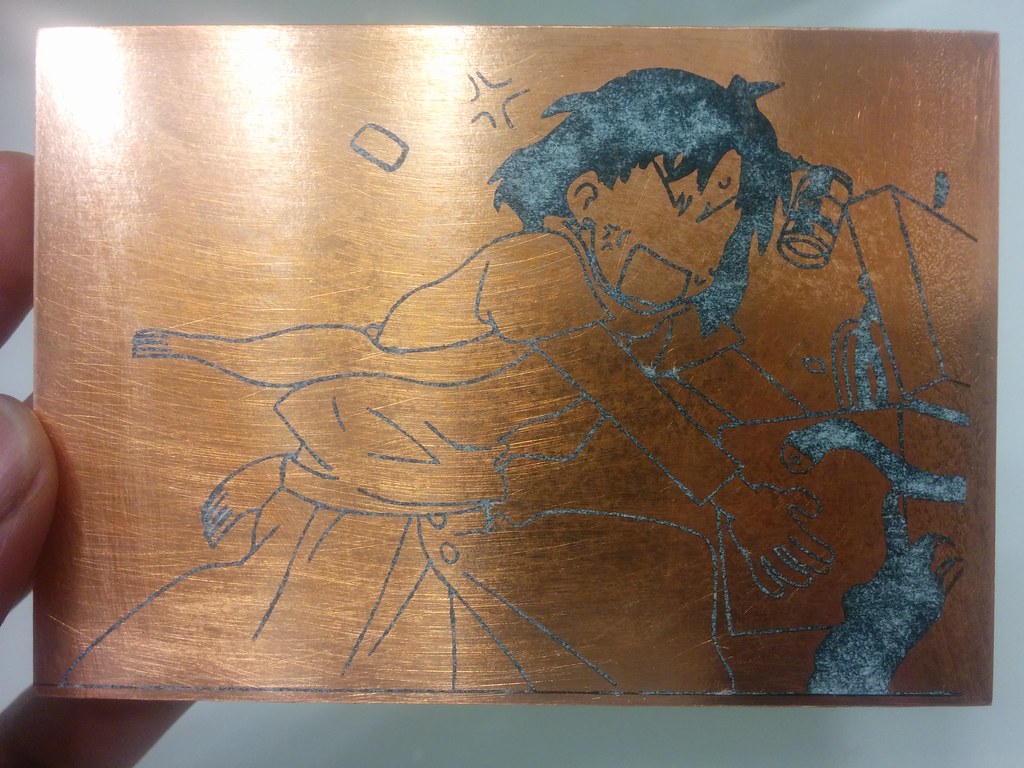
The design:

The toner transfer:
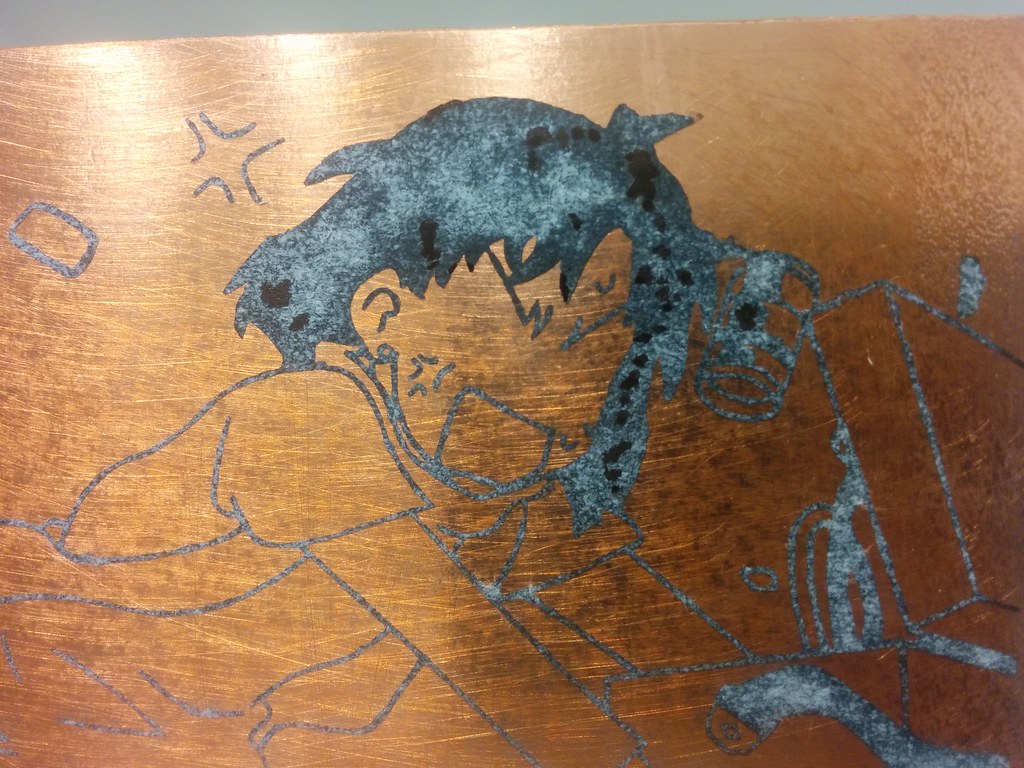
I then touched up spots missed by the transfer using a permanent marker:
- Etching -
I opted to use the “vinegar + hydrogen peroxide + salt” method of etching. The reactants are simpler to handle and store than the “ferric chloride” or “hydrochloric acid + hydrogen peroxide” methods.
I came across this method through Quinn Dunki’s blog post. Vinegar (5% acetic acid) is mixed in a 1:1 ratio with hydrogen peroxide (3%). Salt is sprinkled (how much? I’m not sure but I was generous).
As the board etches, it is recommended to keep wiping it with a sponge and/or to agitate the solution to prevent buildup. The buildup makes it harder for the etchant to reach the copper underneath increasing the time needed to etch the board.
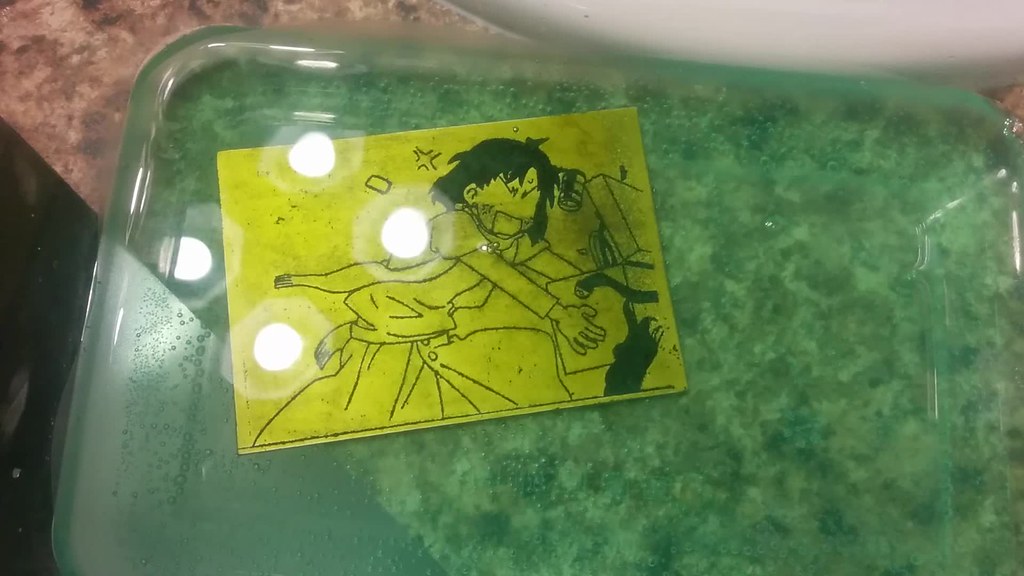
As the copper moves from the board to the solution, the solution turns green.
A video of the etching (nearing completion):
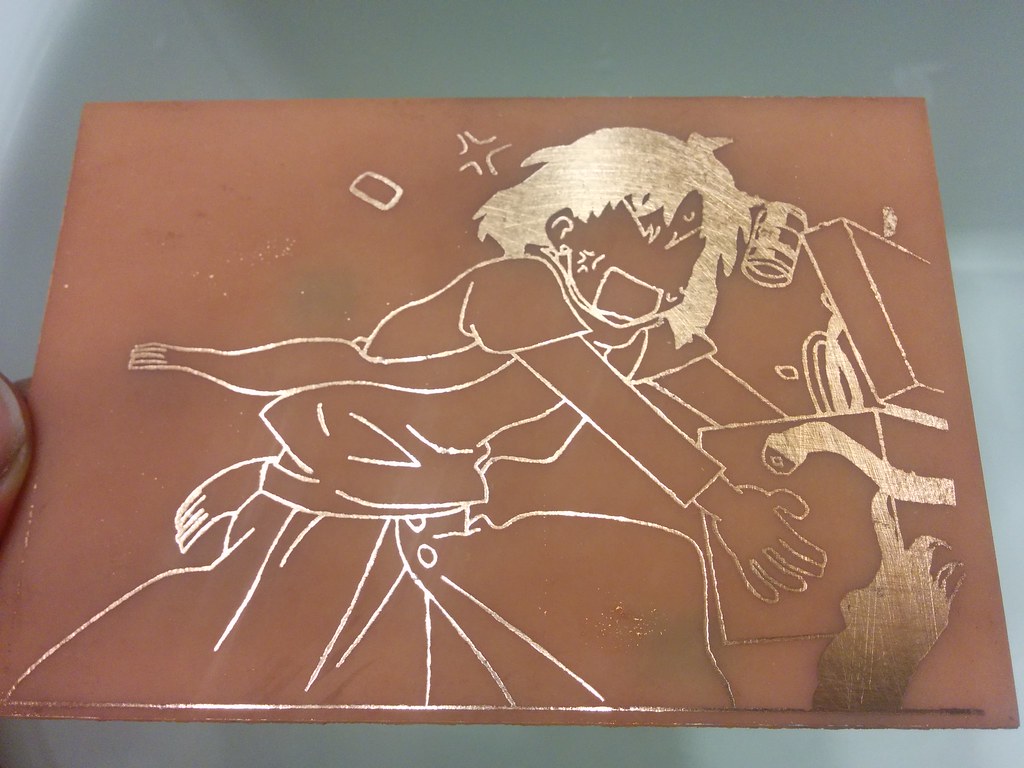
Here is a picture of the board after etching the copper. (I used a cheap phenolic board whose brown color is a bit hard to distinguish from copper):
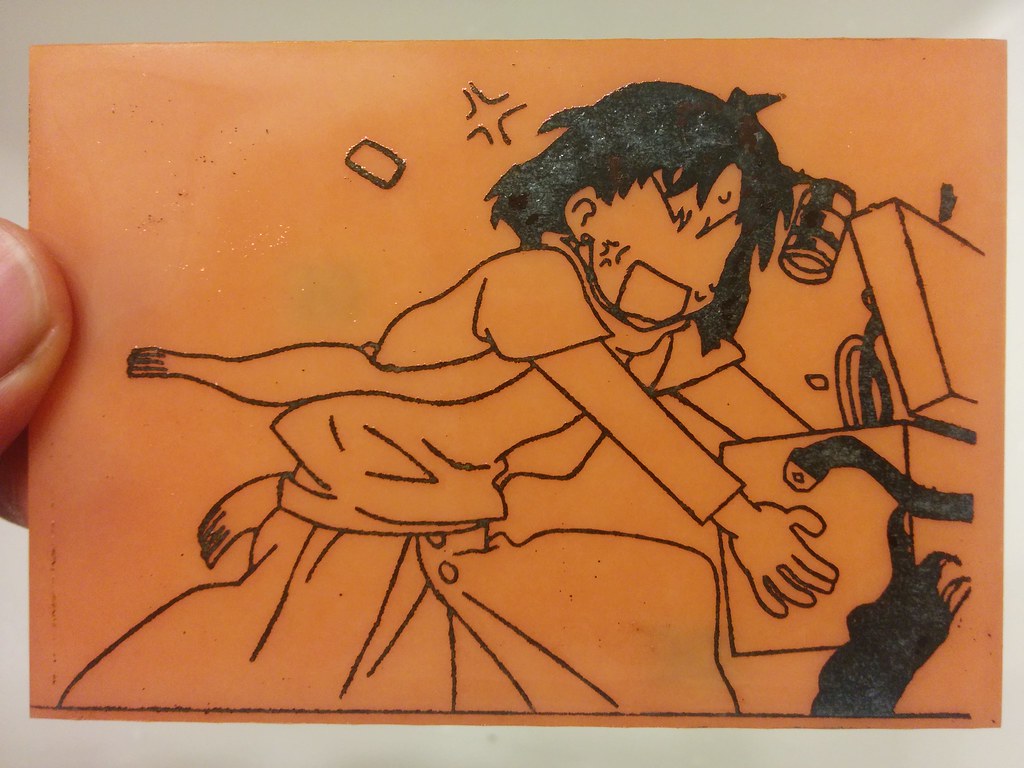
I then used acetone to remove the toner, revealing the copper underneath:
- Disposal -
The remaining solution cannot be poured down the drain (something about the copper being harmful to aquatic life). I read here and here that you can add aluminium to the solution (which is mostly? copper(II) acetate) and it will swap places with the copper:
3Cu(CH3COO)2(aq) + 2Al(s) → 2Al(CH3COO)3(aq) + 3Cu(s)
The resulting aluminium acetate (in solution) can be safely flushed down the drain, and the solid copper and leftover aluminium chucked in the trash (or recycled as scrap metal).
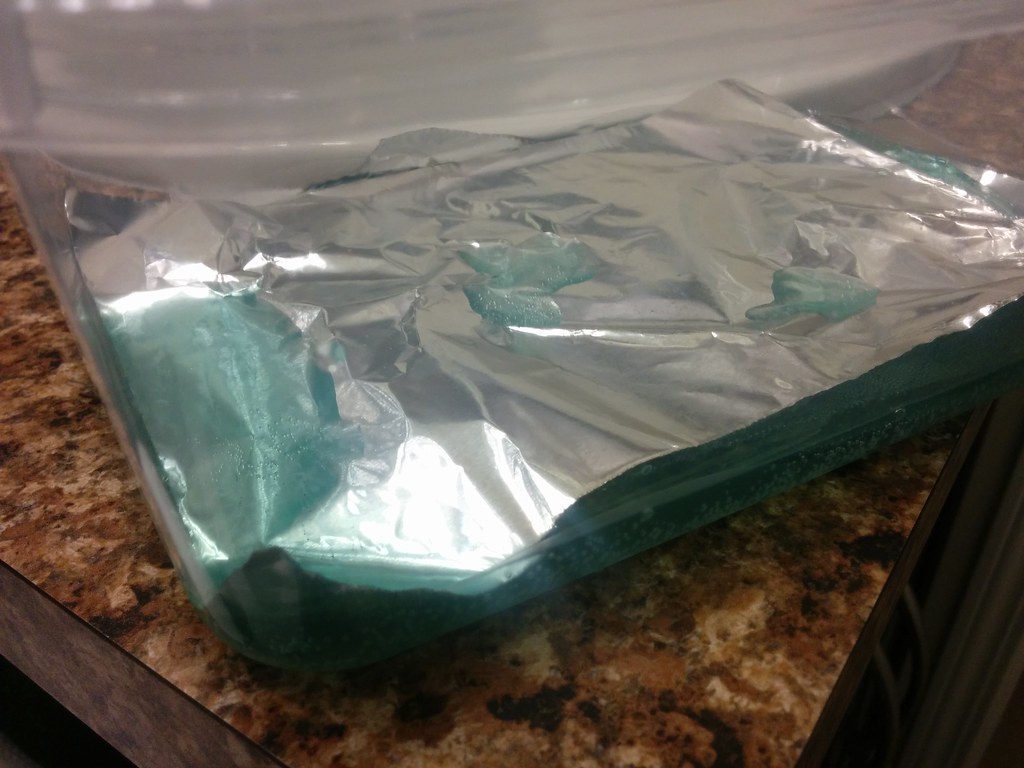
When fresh aluminium is added to the solution, it starts bubbling and becomes warm to the touch:
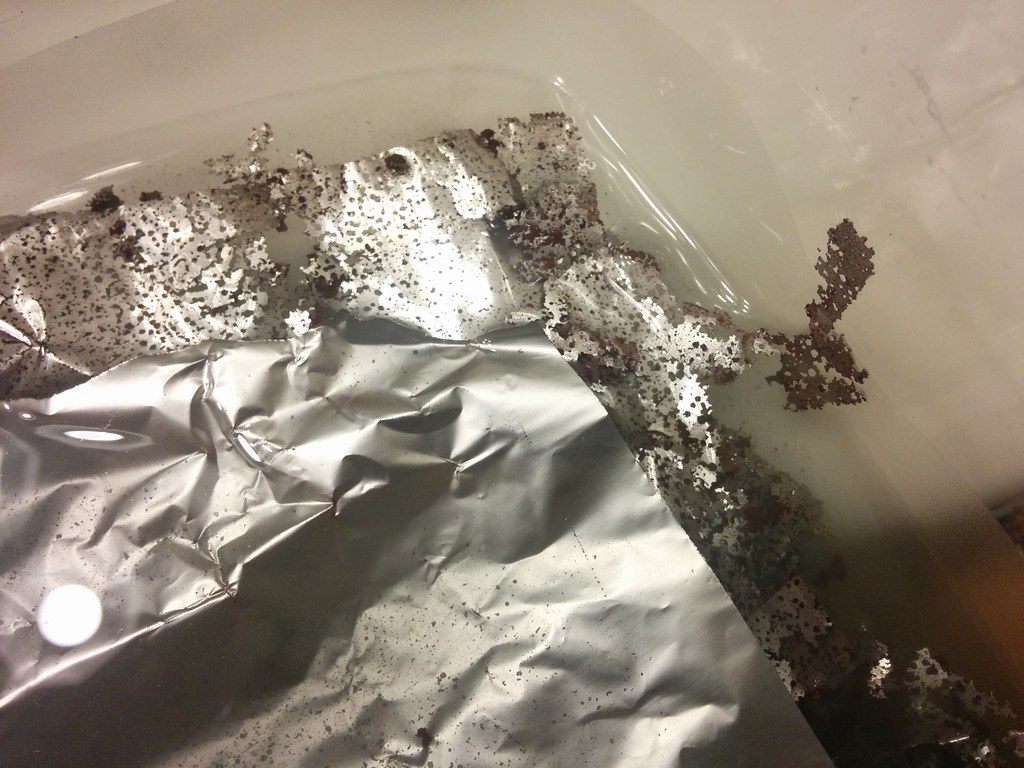
After a while, the solution is no longer green and the old aluminium sheet is pitted. A new one placed on top does not react:

After doing some more research, I am not convinced that this is a safe way to dispose of the solution. A few articles exploring the “vinegar + hydrogen peroxide + salt” approach say that copper(II) chloride is produced during the reaction. When copper(II) chloride is mixed with aluminium, the aluminium chloride produced is considered a hazardous waste and not safe to flush down the drain.
2Al(s) + 3CuCl2(aq) → 3Cu(s) + 2AlCl3(aq)
- But wait! -
This is not a circuit you say! Indeed, but the principle is the same. In an upcoming post, I will be making my first circuit board (including components), stay tuned!