This was a double team with my brother.
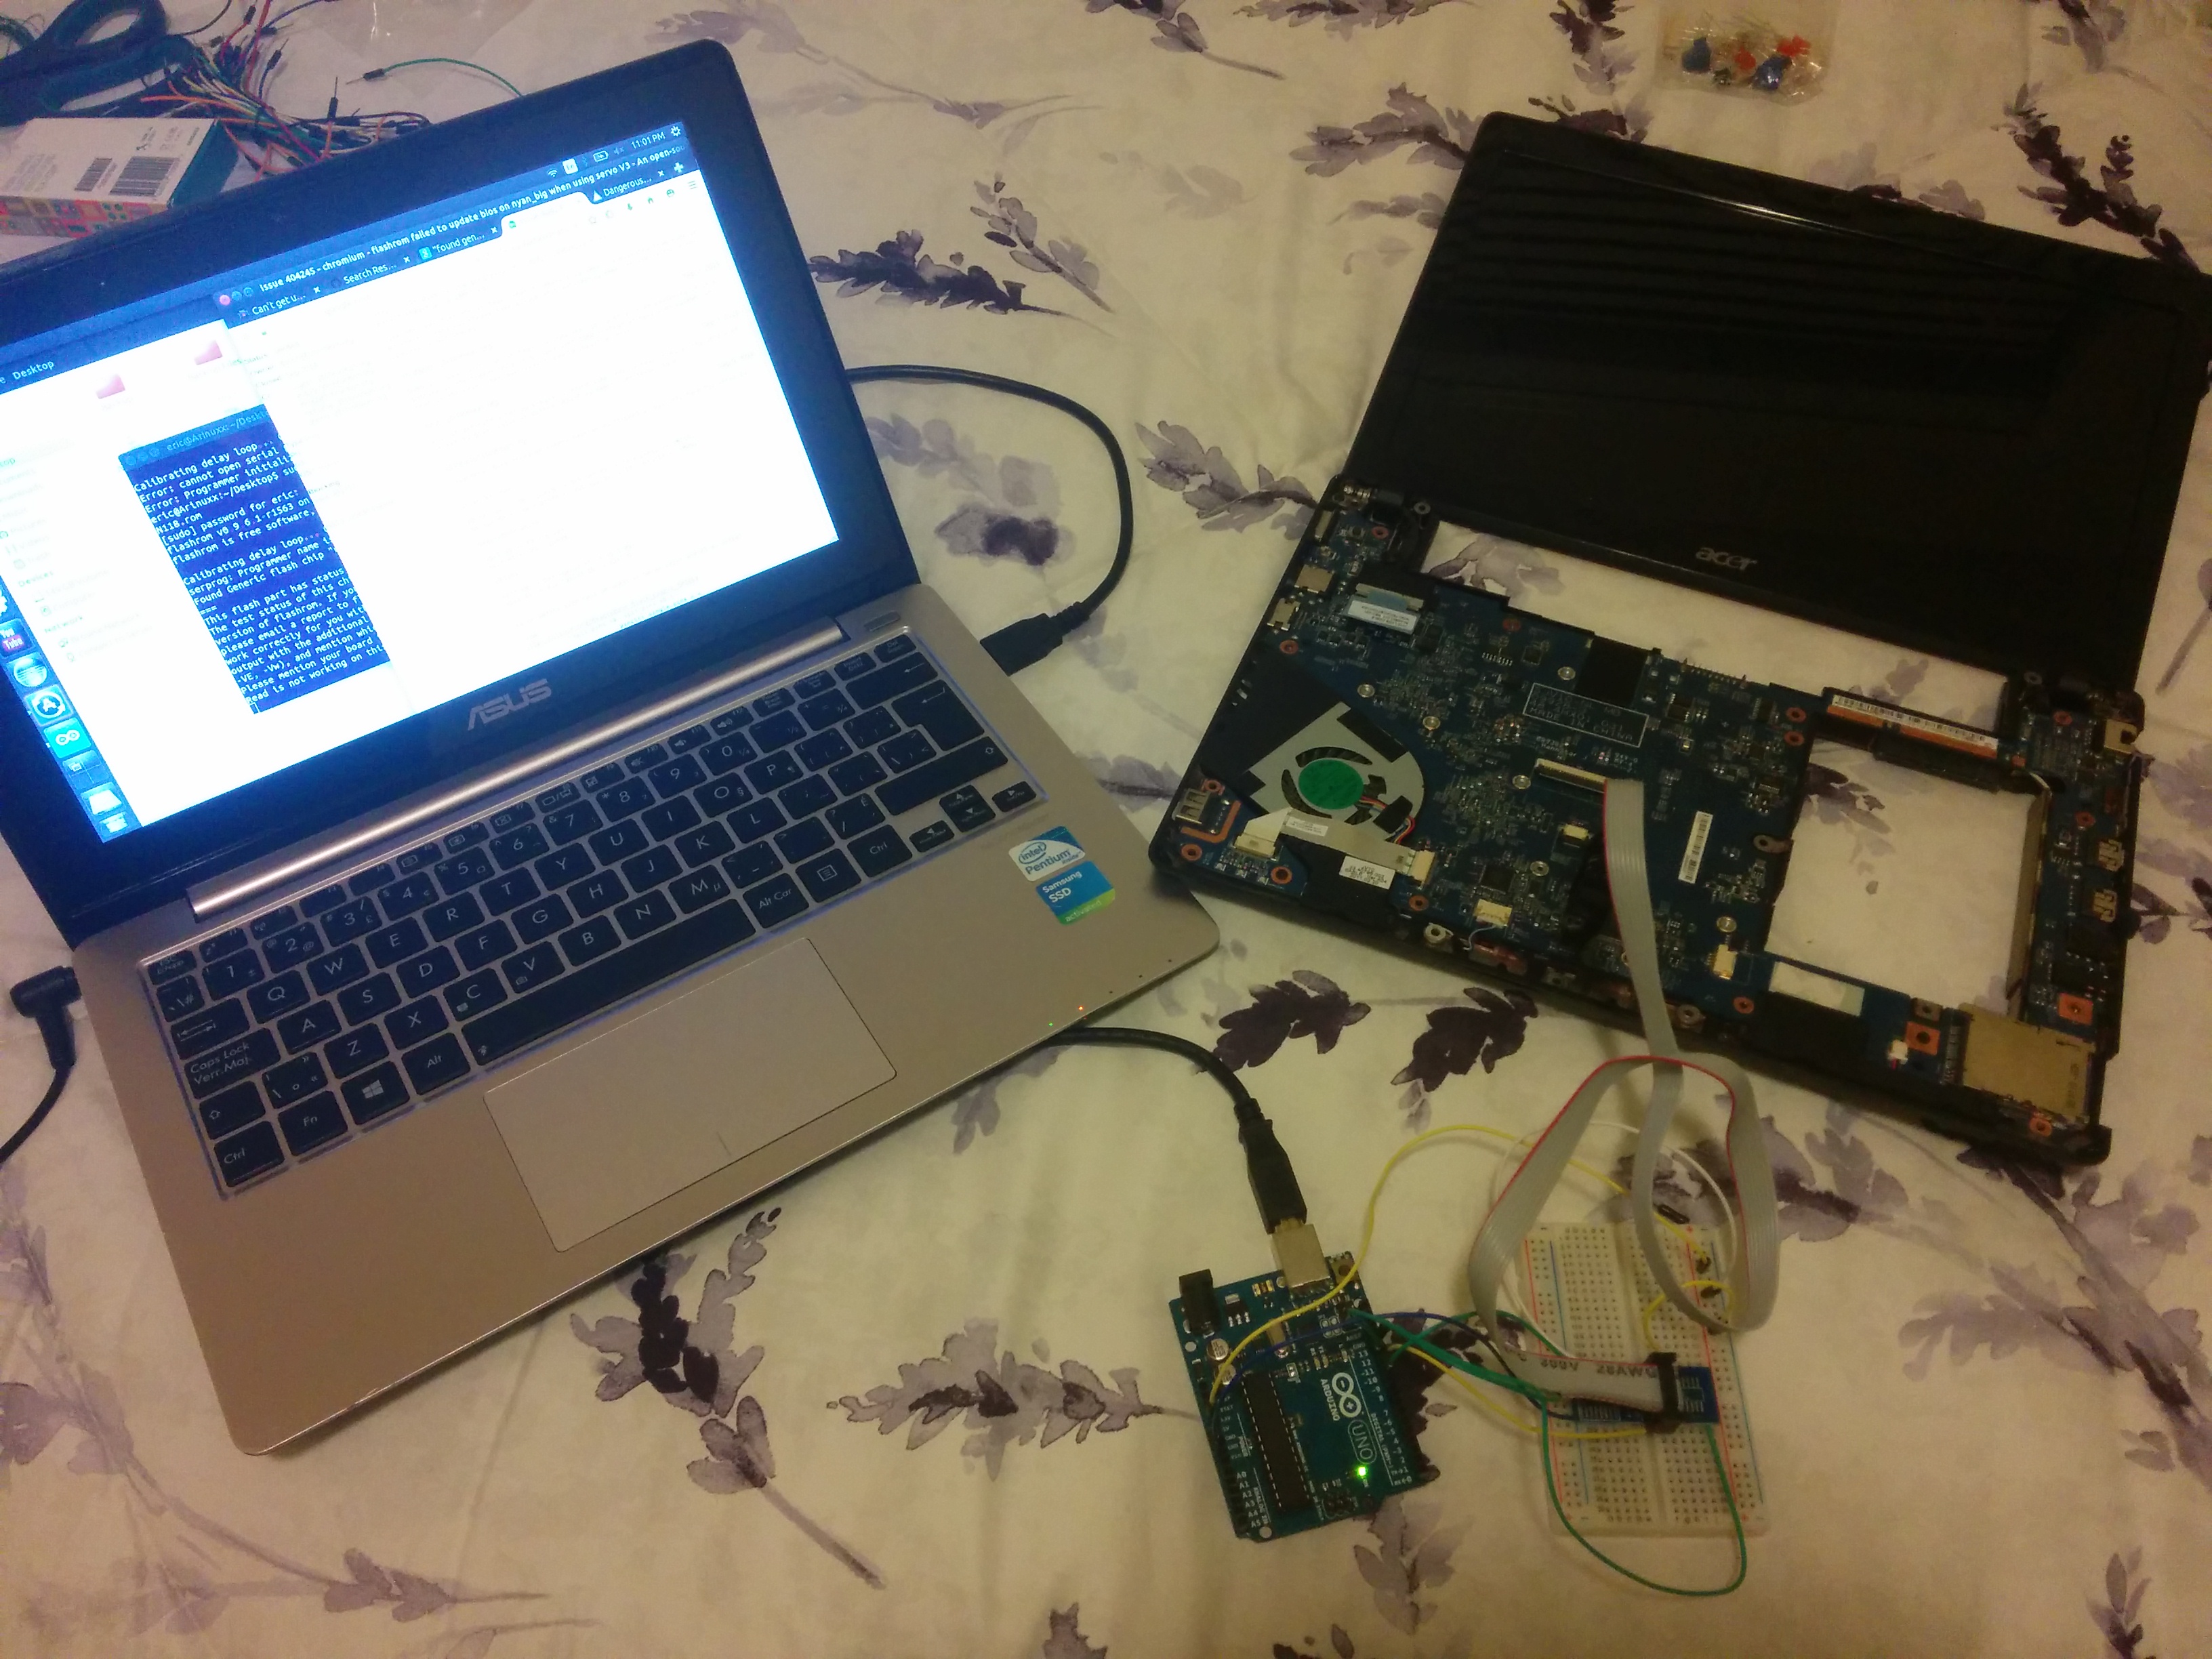
We had a laptop that did not boot and was outside its warranty. After exhaustively checking possible fail points, we narrowed down the likely culprit to a BIOS failure.
Inspired by this Hackaday post, we decided to use an Arduino to flash the chip. The laptop was going to be scrapped otherwise, so we figured we might as well go all out.
— Hardware Side —
Resources used,
- Flashing a BIOS chip
- SPI communication
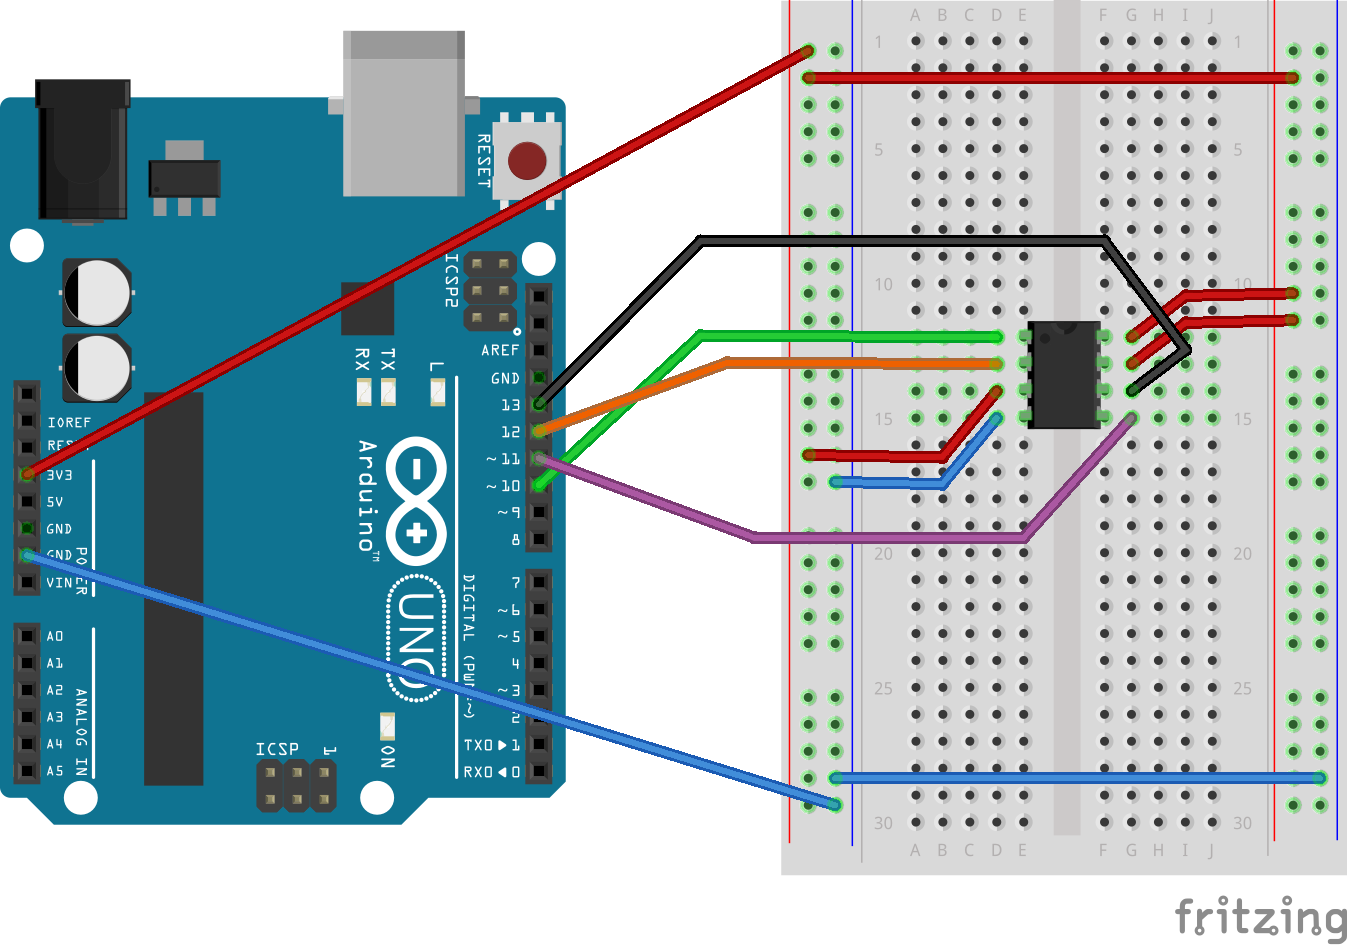
Based on Sinetek’s wiring setup,
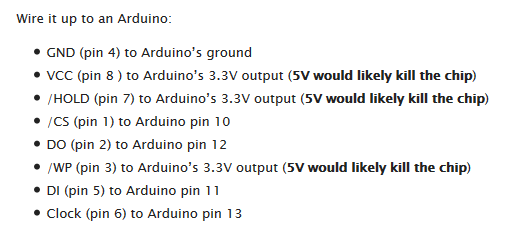
I came up with this schematic,
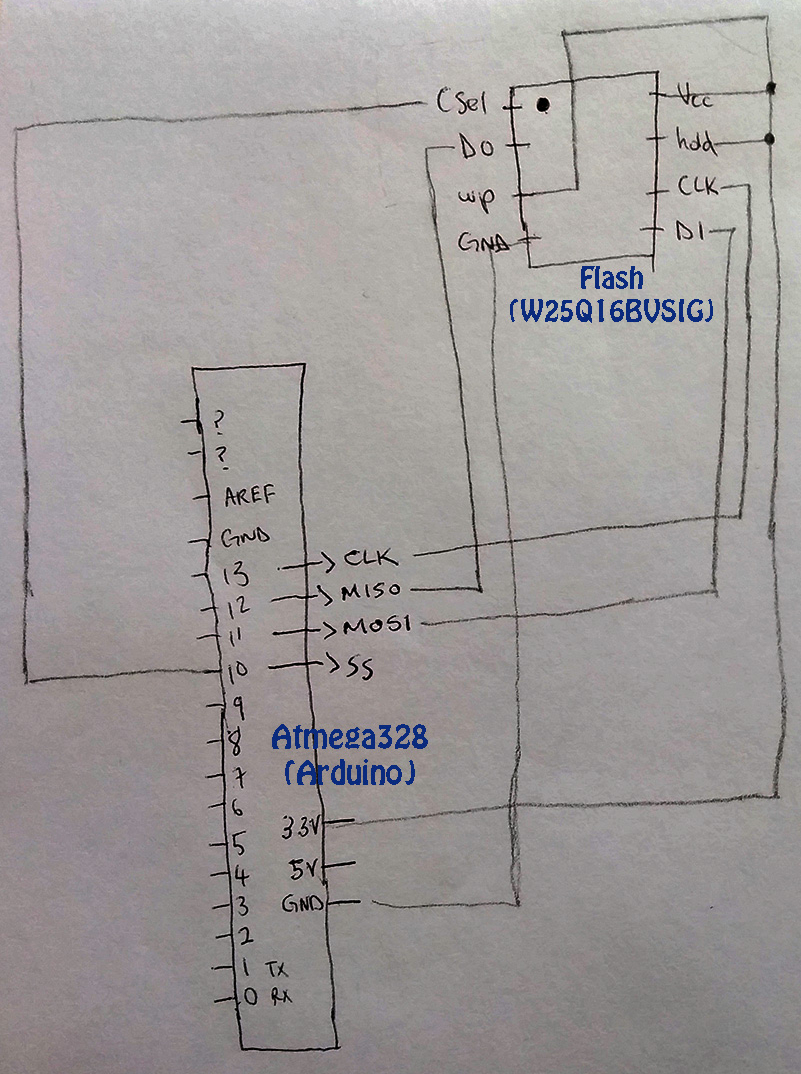
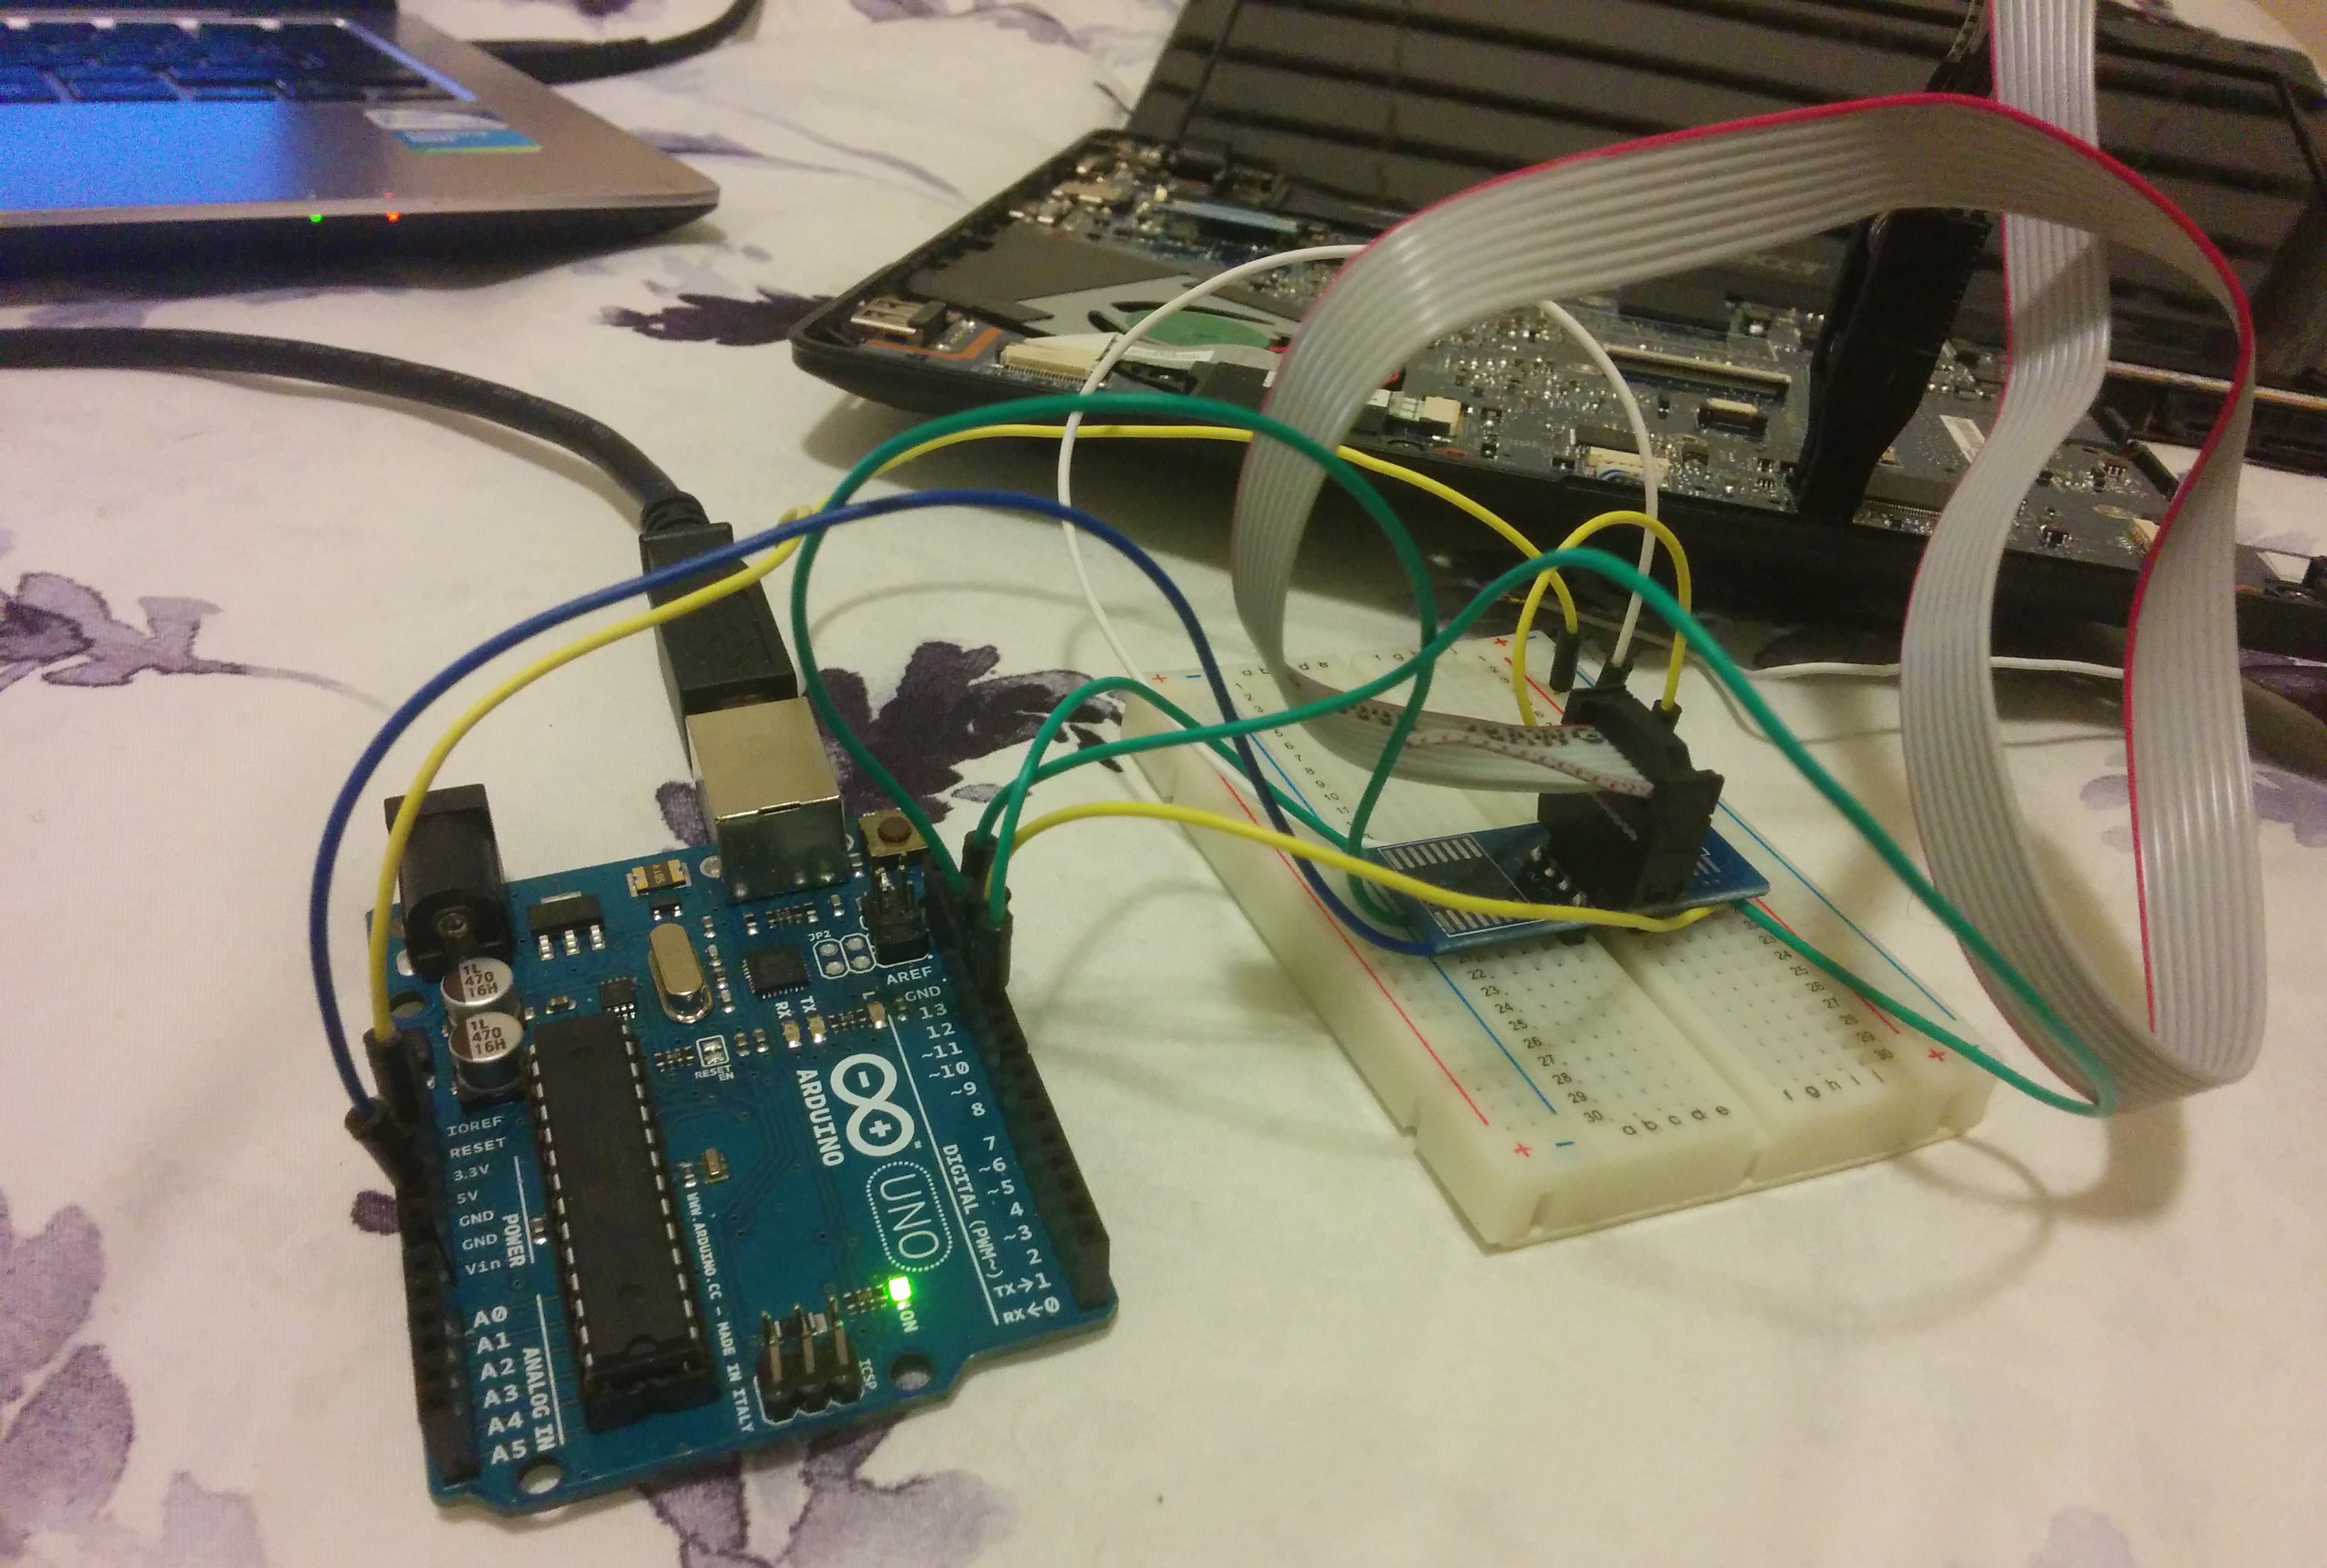
We then proceeded to connect everything together,

— Software Side —
On the software side, here are the steps we took,
- Download Arduino IDE
$ sudo apt-get update
$ sudo apt-get install arduino arduino-core
- Download the avr toolchain
$ sudo apt-get install avr-gcc avr-libc
- Download a recent flashrom containing the serprog protocol
$ sudo apt-get install flashrom
- Download Frser-duino
$ sudo apt-get install git
$ git clone --recursive git://github.com/urjaman/frser-duino
$ cd frser-duino
$ make u2
# Connect arduino to PC then run,
$ make flash-u2
- Run flashrom
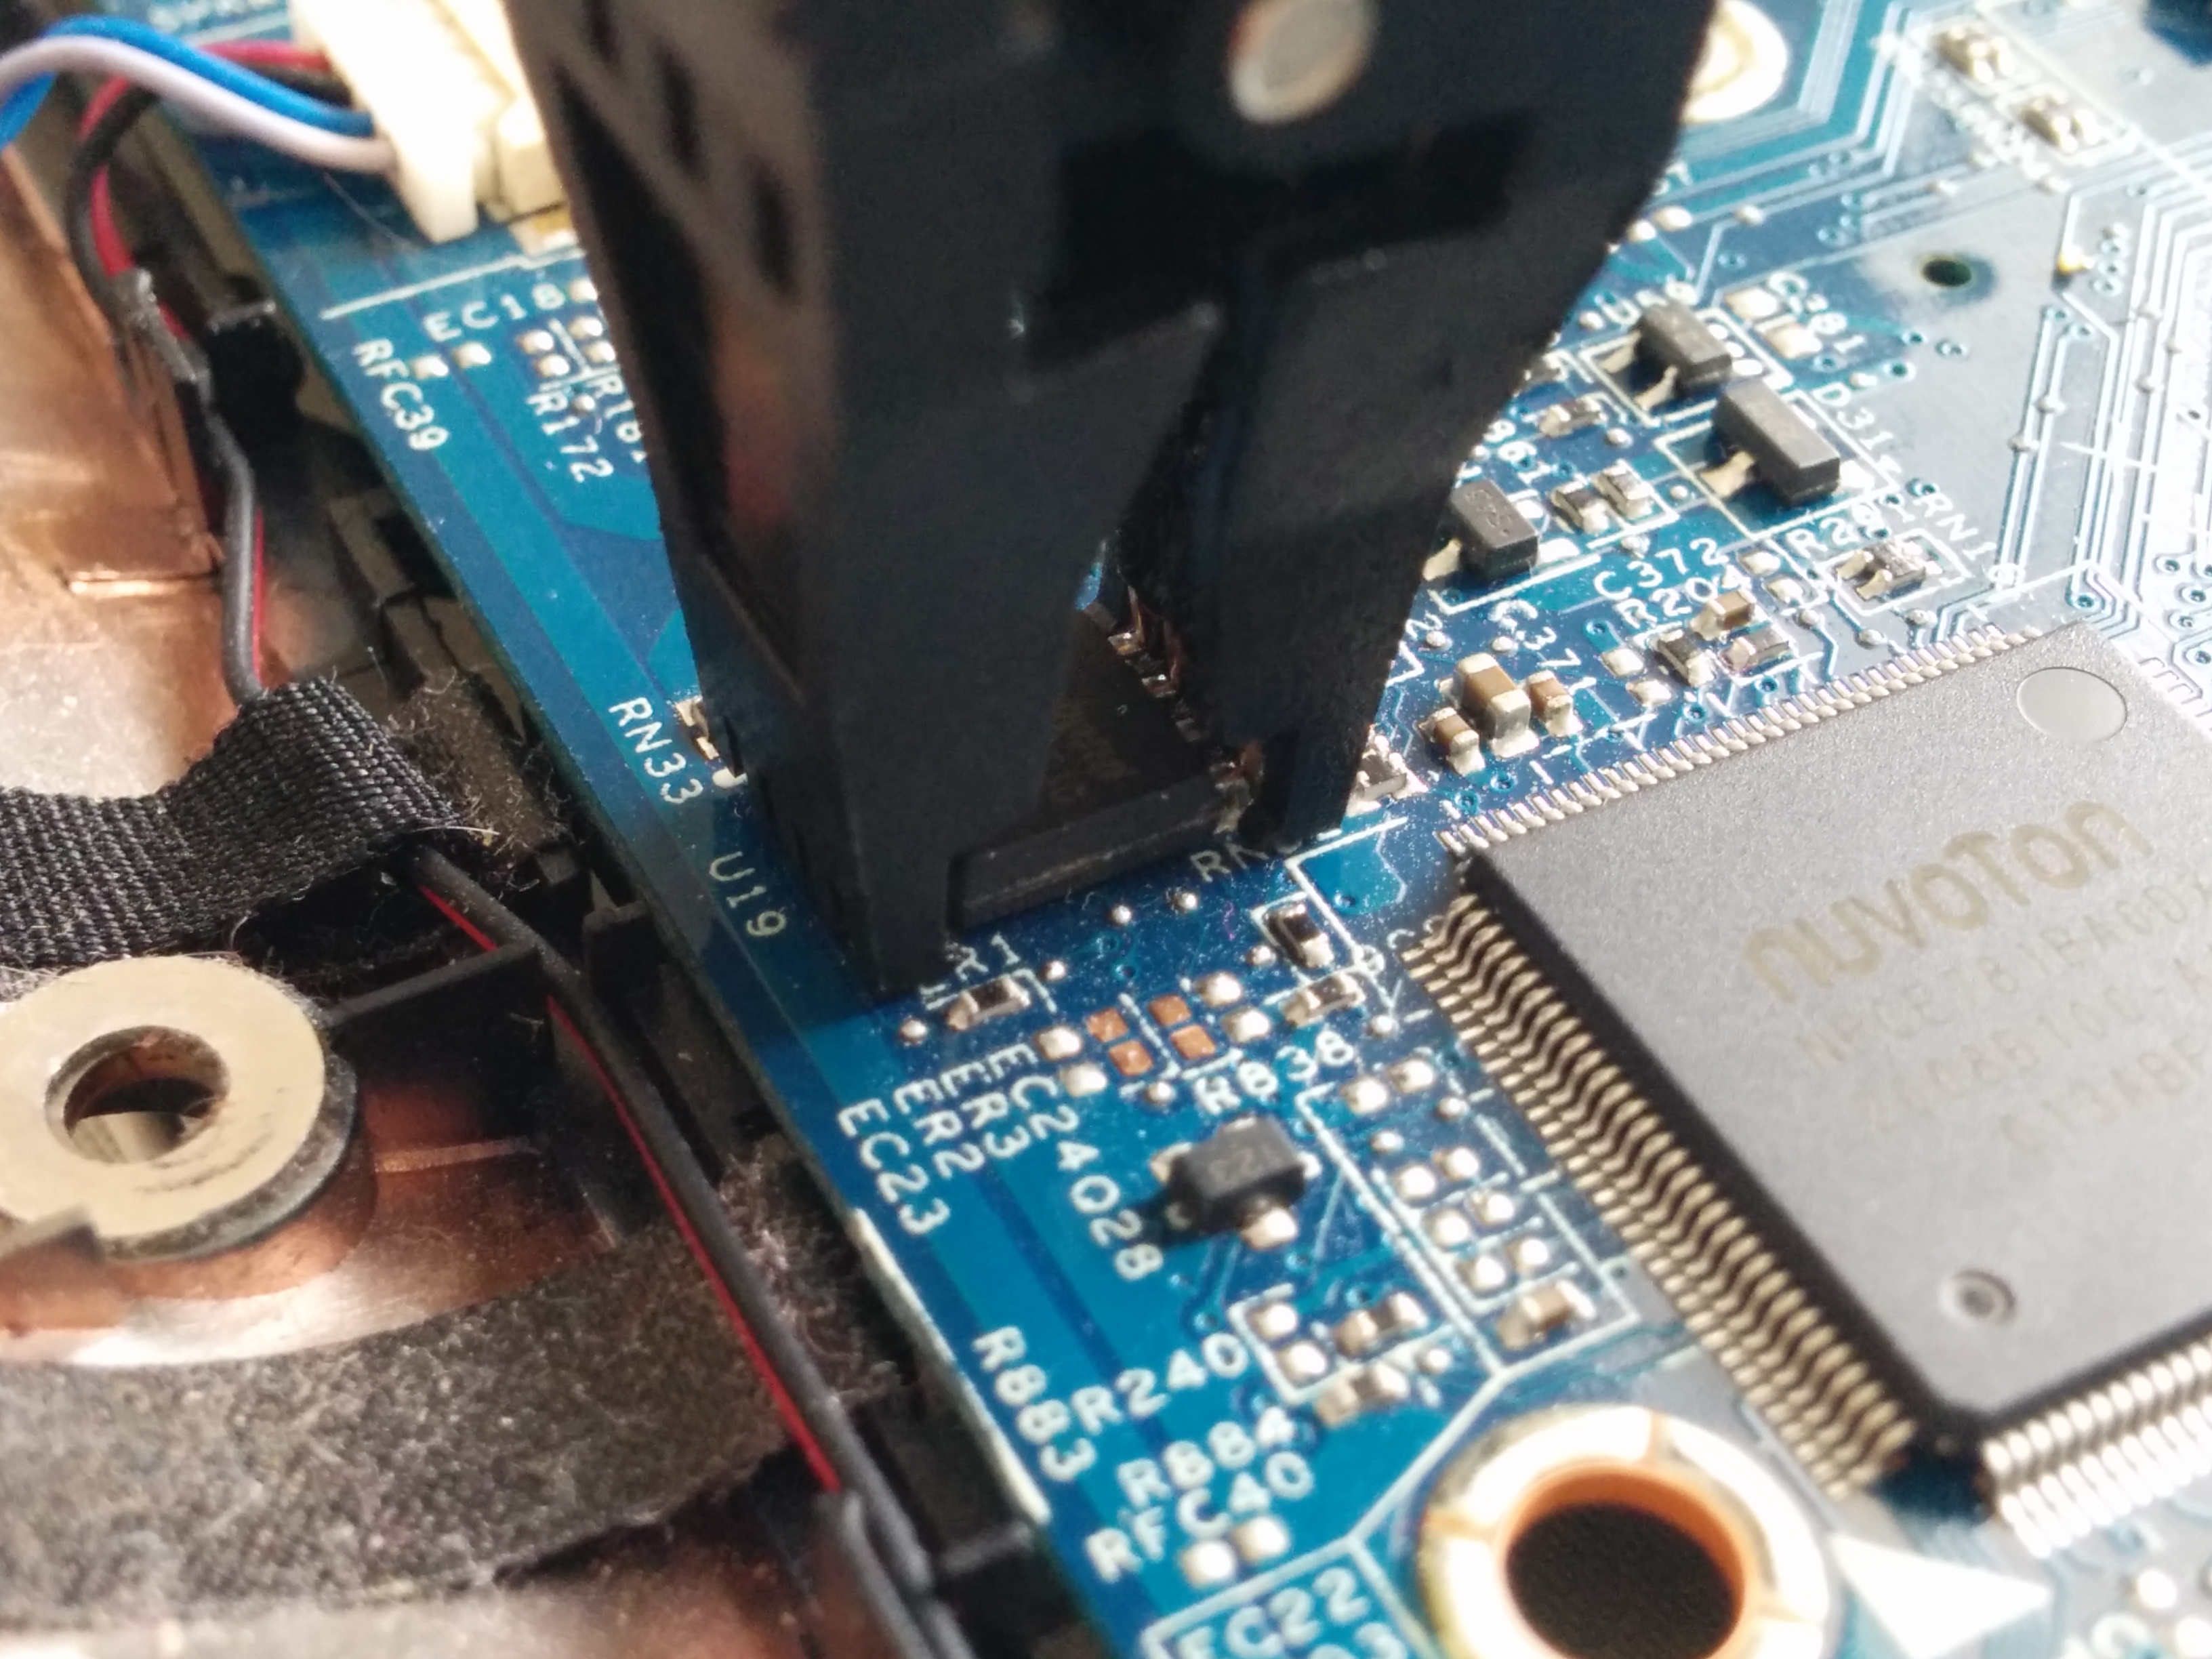
# Hook up flash chip to arduino
# Save rom file wish to write somewhere convenient on your computer
# Flash the chip
$ flashrom -p serprog:dev=/dev/ttyACM0:115200 -w /path/to/rom-file/filename.rom
We got the relevant BIOS image (rom) from the ‘Drivers & Updates’ section of the laptop manufacturer’s website (Acer in this case).
— Results —
Unfortunately, it didn’t work out.
We got this error message,
Found Generic flash chip “unknown SPI chip (RDID)” (0 kB, SPI)
Interestingly, when we disconnected the chip from the circuit, we still got the same error message. This meant that flashrom was not detecting the BIOS chip. This was further confirmed by running a verbose version of the flashrom command.
sudo flashrom -p serprog:dev=/dev/ttyACM0:115200 -VVV
The log looked something like this one, and showed that flashrom had exhausted all of its libraries and returned a generic message.
Probing for AMIC A25L05PT, 64 kB: serprog_spi_send_command, writecnt=1, readcnt=4
RDID returned 0xf0 0x60 0xff 0xe8. RDID byte 0 parity violation. probe_spi_rdid_generic: id1 0xf0, id2 0x60ff
Probing for AMIC A25L05PU, 64 kB: serprog_spi_send_command, writecnt=1, readcnt=4
RDID returned 0x00 0xfe 0x00 0x00. RDID byte 0 parity violation. probe_spi_rdid_generic: id1 0x00, id2 0xfe00
...
Probing for Winbond W25Q16, 2048 kB: serprog_spi_send_command, writecnt=1, readcnt=3
RDID returned 0xff 0xc0 0xc0. RDID byte 0 parity violation. probe_spi_rdid_generic: id1 0xff, id2 0xc0c0
...
Probing for Generic unknown SPI chip (RDID), 0 kB: serprog_spi_send_command, writecnt=1, readcnt=3
RDID returned 0x79 0x10 0x0f. probe_spi_rdid_generic: id1 0x79, id2 0x100f
Found Generic flash chip "unknown SPI chip (RDID)" (0 kB, SPI) on serprog.
Many more attempts were made, tweaking this and that, but we got the same error message each time.
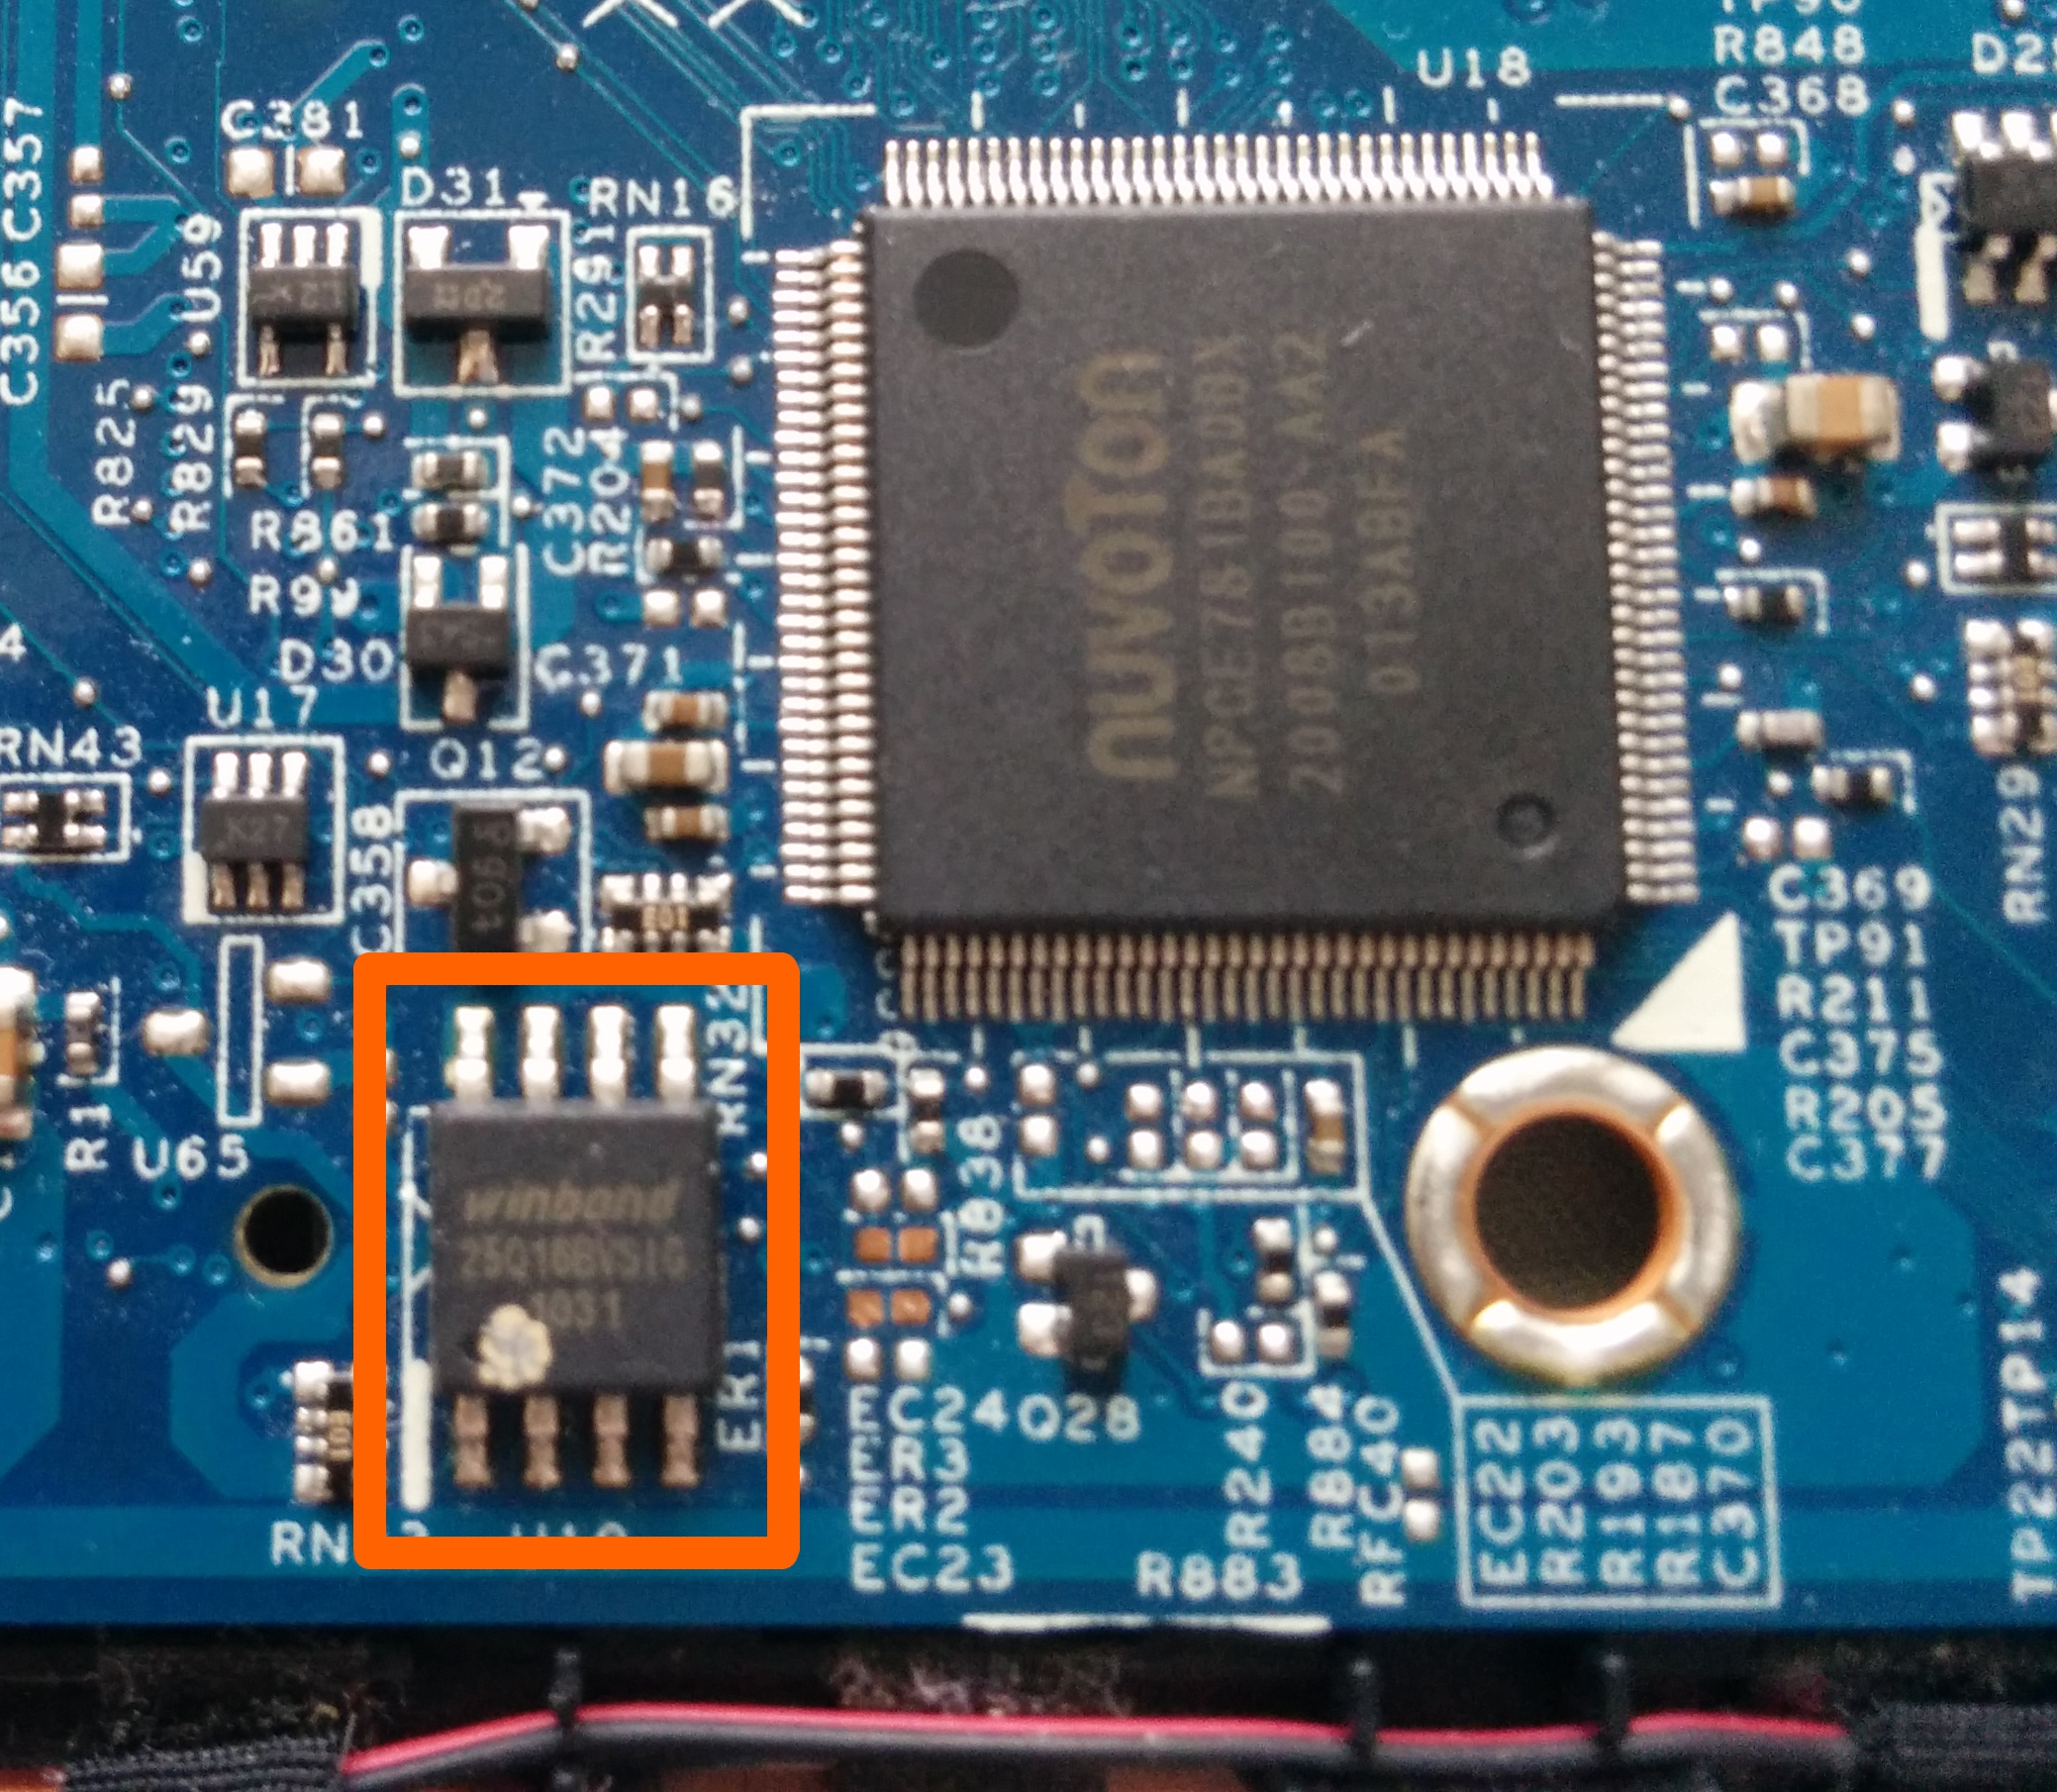
The chip model (Winbond W25Q16B) according to the Flashrom documentation is supported. In addition, the schematic used to create the circuit came from three different sources and each had success in their implementation.
Maybe the chip is dead? Or we’re missing something obvious.
— Just in case —
To verify it wasn’t a faulty connection, I decided to bypass the test clip and carefully wind each individual wire to each pin of the chip. Masking tape was used to ensure no unintended contact between exposed wires.
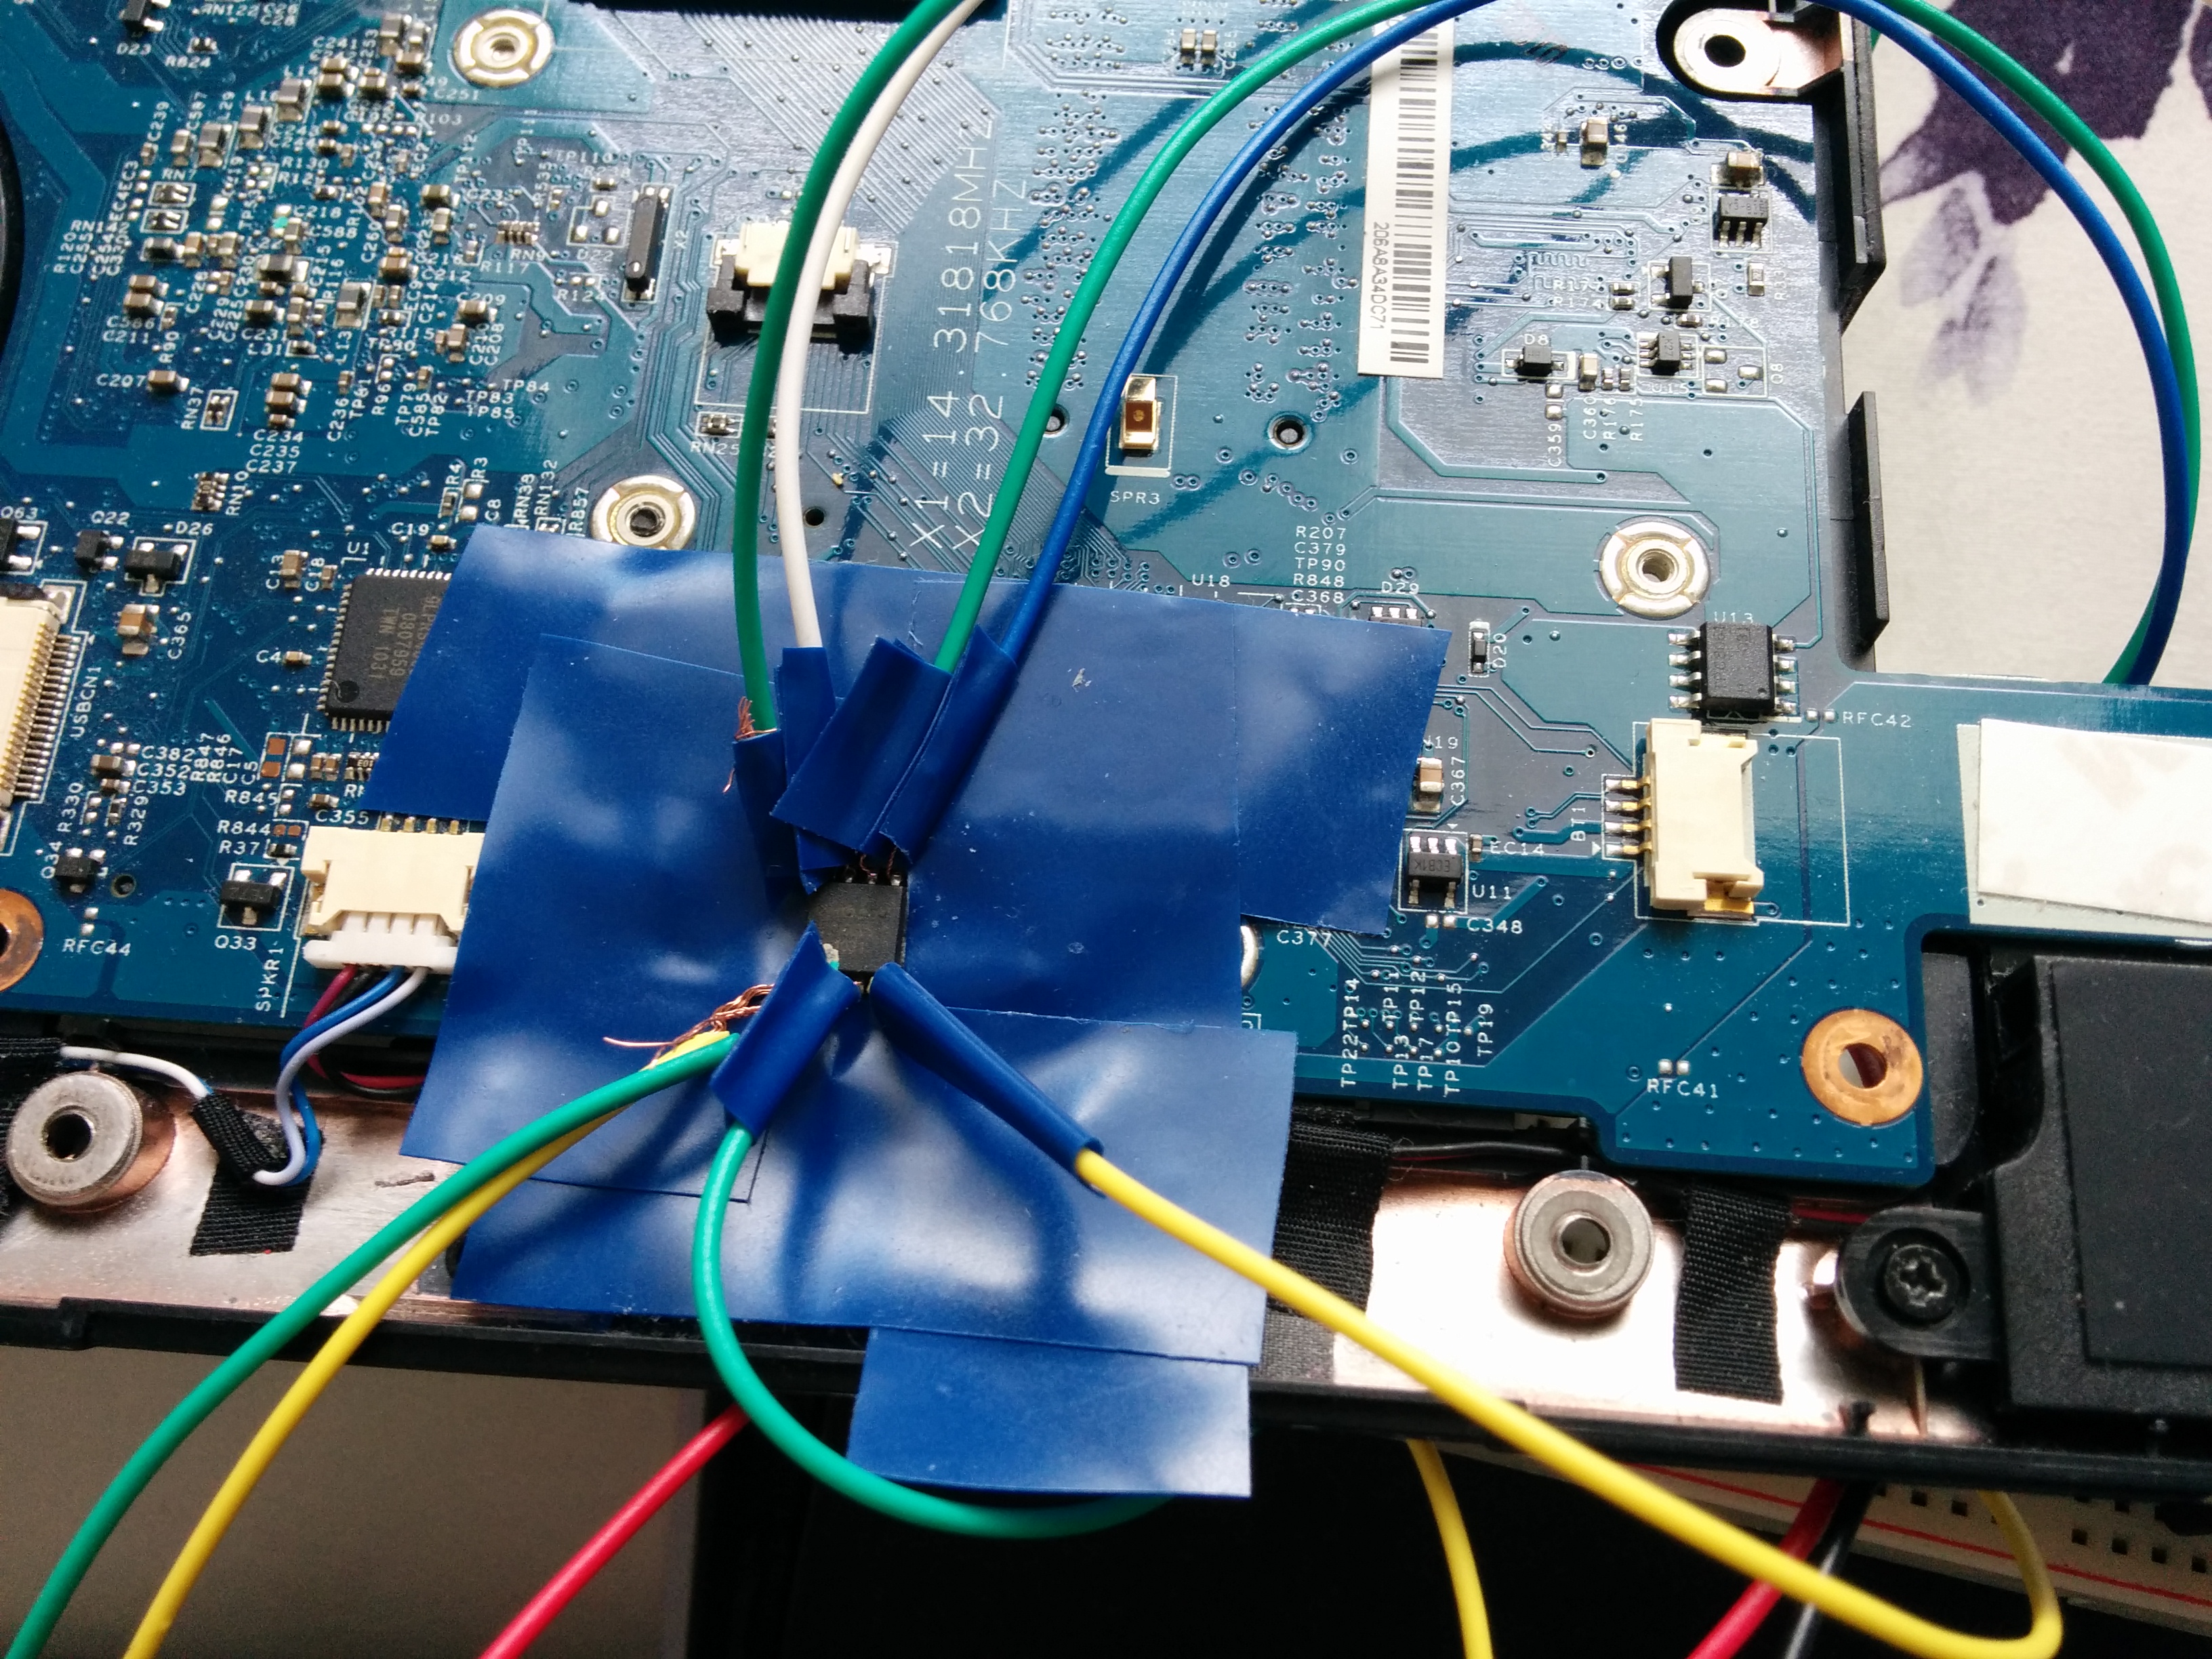
Annndddd…….
It still didn’t work =P
— Future Action —
The BIOS chips are awfully cheap! On Ebay, a pack of five is selling for $3. A possible plan of action could be to buy a new chip and flash it, desolder the current BIOS chip and solder the new one on, then turn on the laptop and (assuming the chip was the cause of failure in the first place and nothing else got/gets messed up in the process) watch as the laptop comes to life.