I bought a laminator. I was able to get it for a good price because it was sold as “not working”.
Tag: Repair
Laminator Repair
Kettle Repair
Our water kettle stopped working.
Motor Repair
The fan in one of our bathrooms failed.
Misadventures of Removing a Dual Boot Setup - Part 3/3
- Disclaimer -
This is a writeup of my experience. It is not a “HOW-TO” guide. If you choose to apply the contents of this post, you do so at your own risk.
- Preamble -
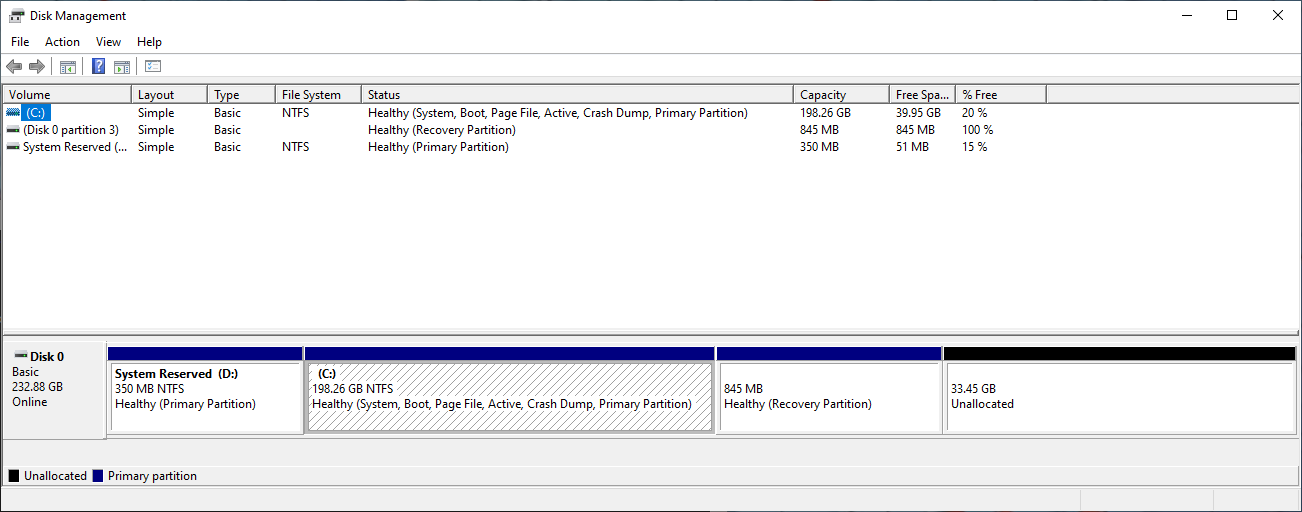
Back in Step 1 - Remove Ubuntu partitions, I managed to successfully delete the Ubuntu partitions. Unfortunately, the Recovery partition lay in-between my C-drive and the new unallocated space. This prevented me from being able to add the space to the C-drive using Disk Management.
Misadventures of Removing a Dual Boot Setup - Part 2/3
- Disclaimer -
This is a writeup of my experience. It is not a “HOW-TO” guide. If you choose to apply the contents of this post, you do so at your own risk.
- Step 3 - Murphy -
More likely than not, something will go wrong. What goes wrong varies widely, and likewise how to resolve it. What follows is what failed in my case, and how I got around it.
Misadventures of Removing a Dual Boot Setup - Part 1/3
- Disclaimer -
This is a writeup of my experience. It is not a “HOW-TO” guide. If you choose to apply the contents of this post, you do so at your own risk.
- Why -
I had previously configured my computer to host two operating systems: Windows 10 and Ubuntu (Linux). However, the dual boot setup is inconvenient. Only one operating system can run at a given time. To use the other, you have to restart the computer and boot into it. As such, I almost never use my Ubuntu OS. It’s just sitting there taking up valuable disk space.
- Overview -
The standard procedure to remove a Dual Boot setup (at the time of writing) seems to be this:
- Remove the Ubuntu partition
- Repair the Windows boot loader
Phone Repair: Part 3 - Screen Deux
Remember how I bought the screen/digitizer/frame assembly so I wouldn’t have to deal with glue. Well,
Phone Repair: Part 2 - Screen
After what feels like years, the screen finally arrived!
I ordered the screen and frame assembly. Though it costs more and you loose the OEM frame, installation is much easier. Rather than trying to peel off the cracked screen and glue in a new one, you can “just” swap components from the old frame to the new one.
The quality of the assembly is great for a replacement and the price I paid. The flex cable looked a bit worn… maybe the screen was a salvage? The frame is of a lower quality than the OEM frame, but this is to be expected.
Tools useful for this repair:
- spudger (essential for removing the back cover and battery)
- heat gun (or blowdrier) for softening adhesives
- 300LSE double sided tape (not critical but nice to have)
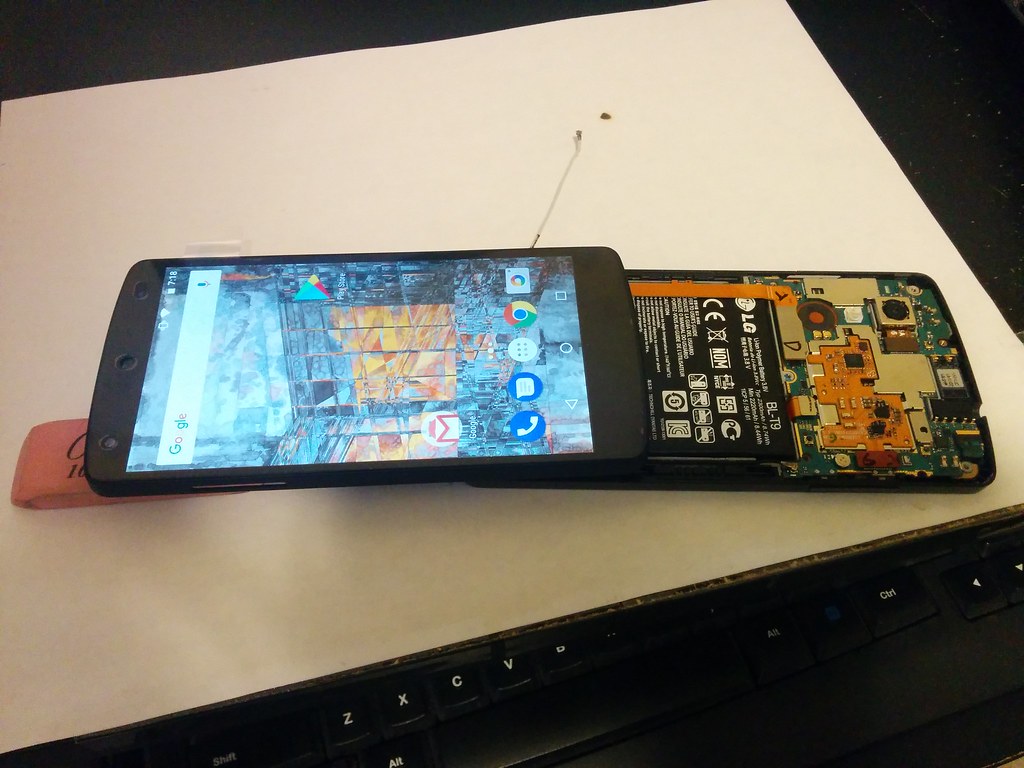
In the image below, I am testing that the screen works before moving components from the old frame to the new one:
Phone Repair: Part 1 - Power Button
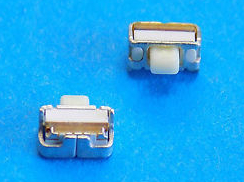
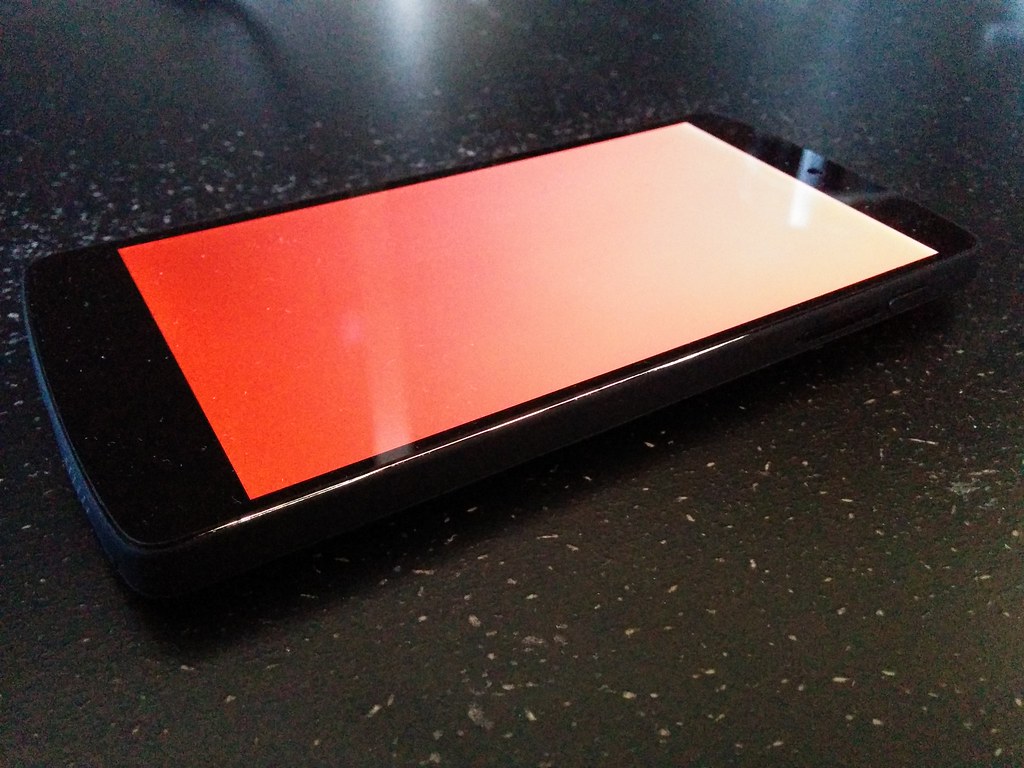
I dropped my phone one too many times. This time the screen gave in and shattered.1 Whether related or not, my power button soon failed after and my phone was unable to boot. It would get about a second into the boot process before restarting again, as if the power button was constantly being pressed. The behaviour was the same even in recovery mode indicating that it was likely a hardware rather than software problem.
A Google search revealed that failure of the power button is a common problem with the Nexus 5. I tried the easy solution of partially disassembling the phone to get at the button and clean it, its rubber pad, and the surrounding area with isopropyl alcohol. Unsurprisingly, it didn’t work.
In my search, I came across this awesome article by Gregor van Egdom. It has a great explanation and photos of how this particular button works and why it likely fails. His solution is to replace the button. So I went ahead and ordered a replacement from Ebay ($5 with shipping from the US (I could have gotten it cheaper but I wanted it now rather than later as my phone was unusable)).
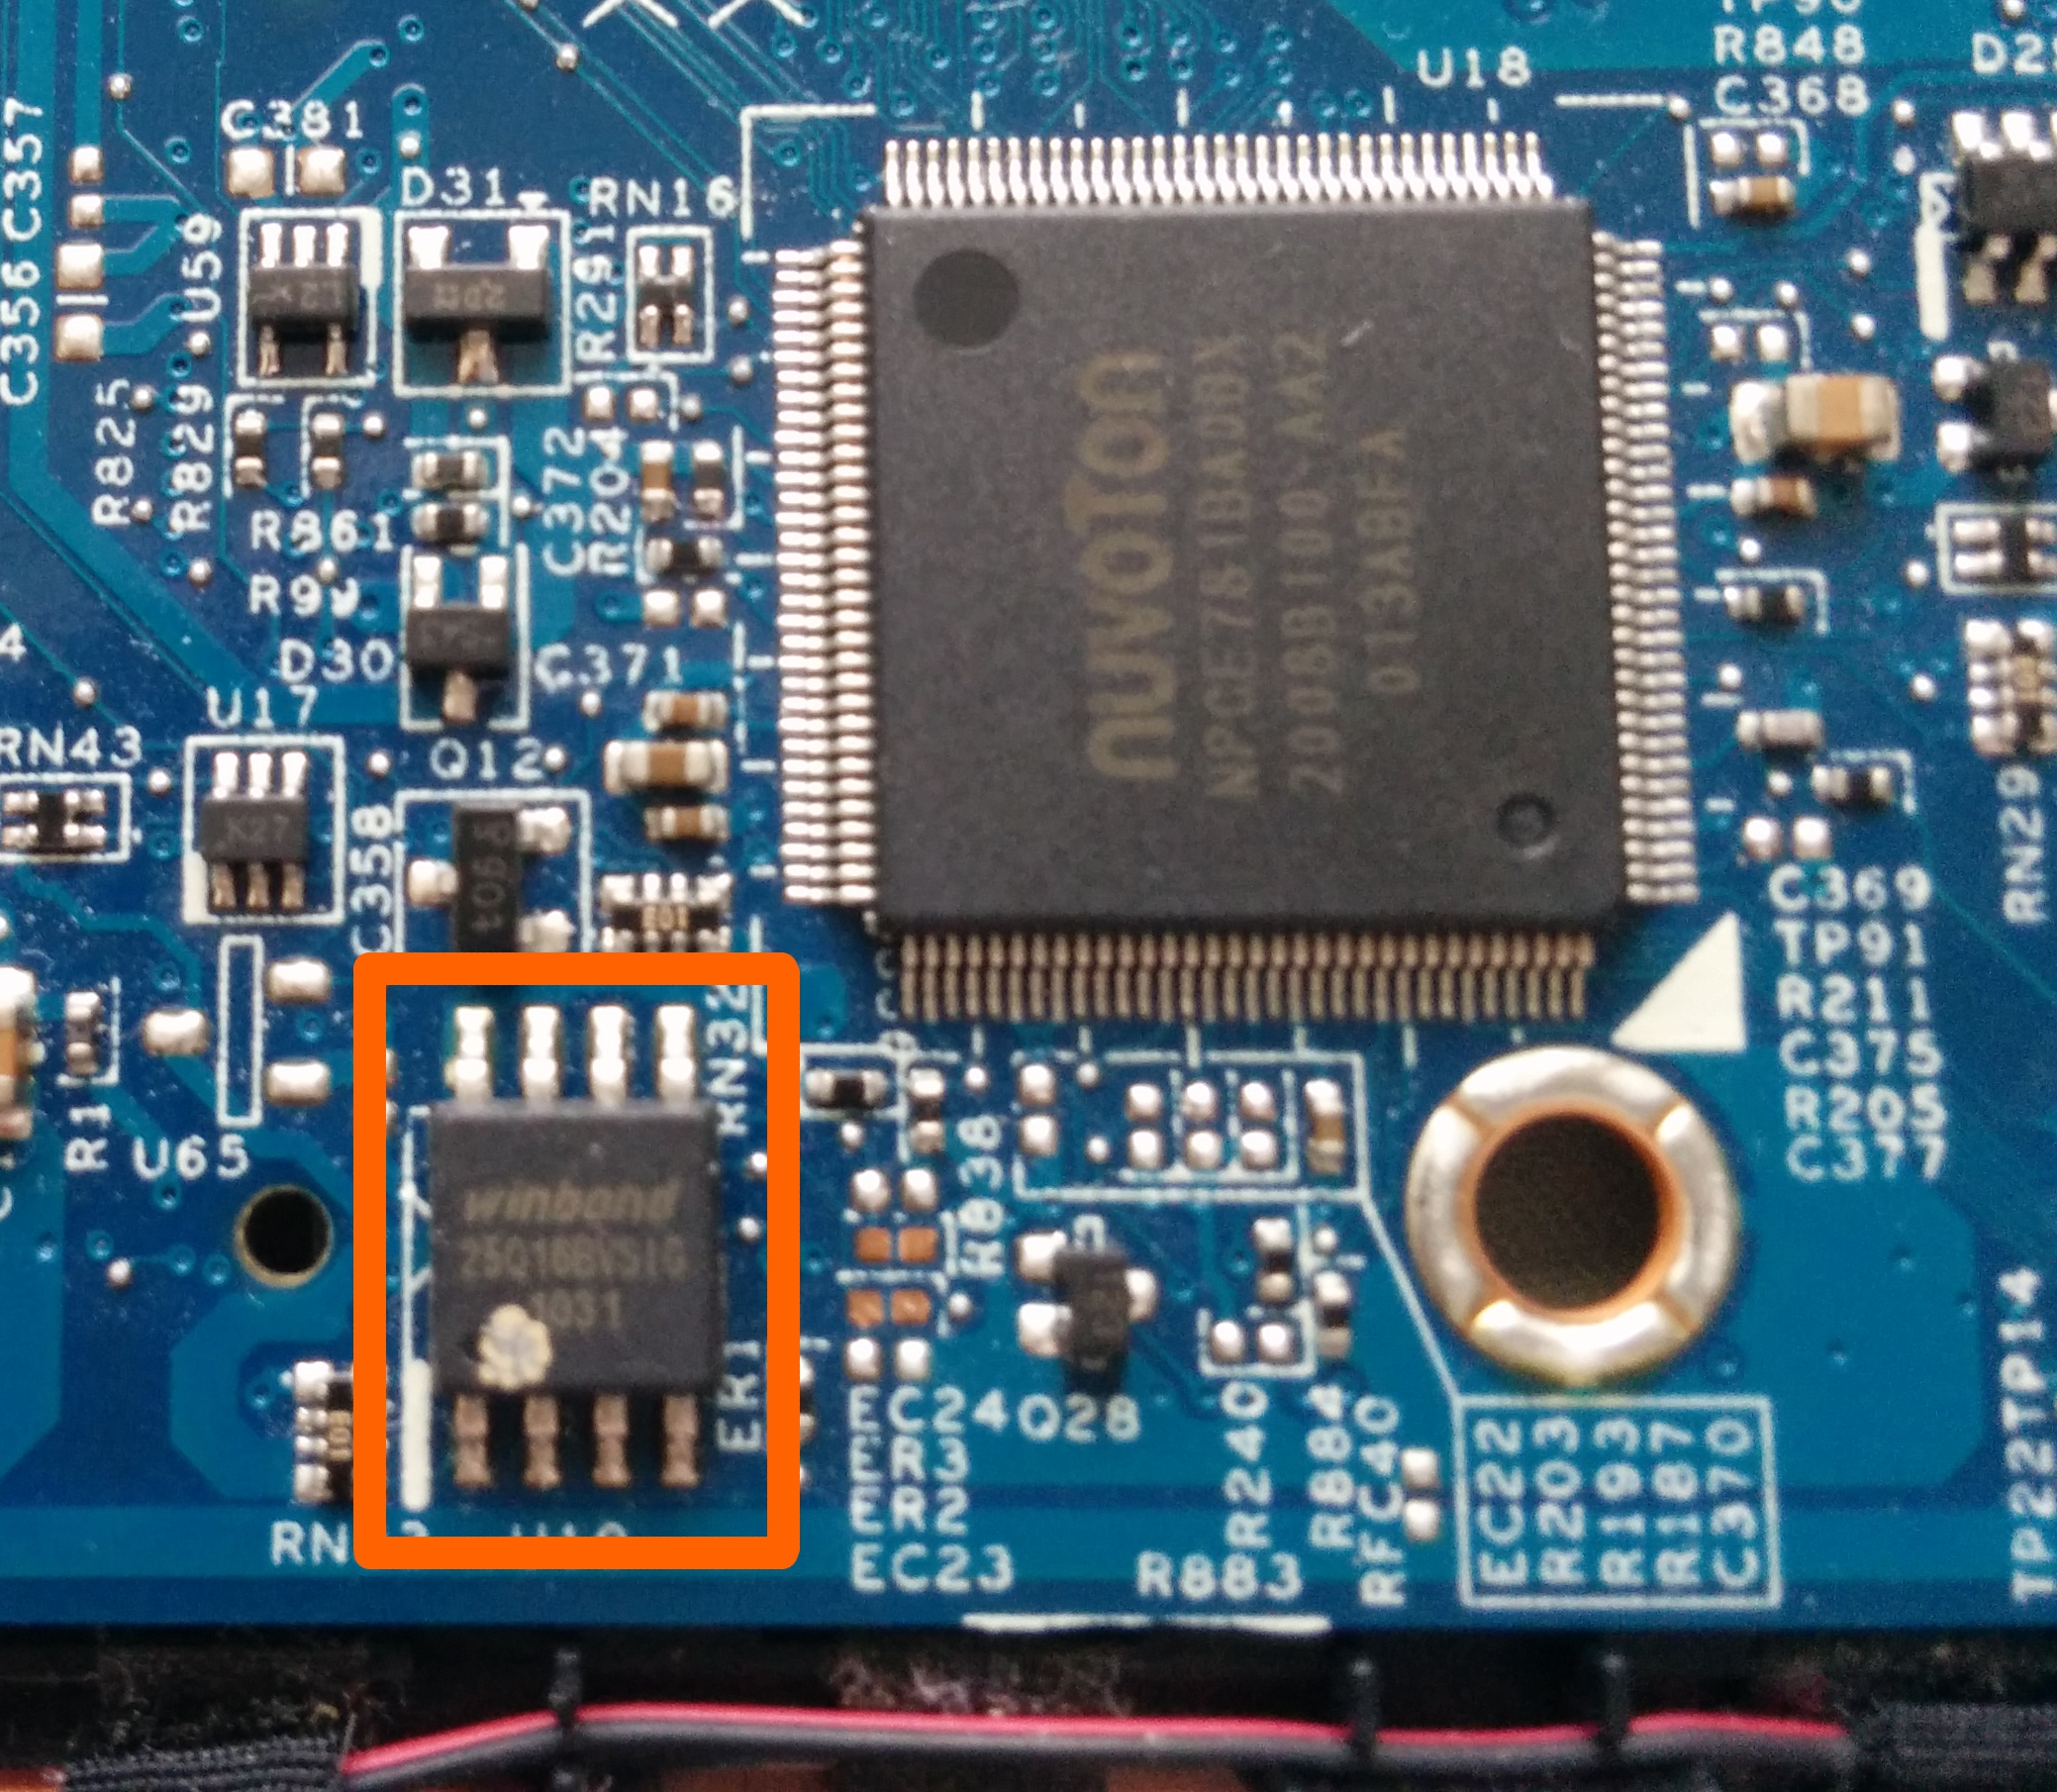
Flashing a BIOS With Arduino
This was a double team with my brother.
We had a laptop that did not boot and was outside its warranty. After exhaustively checking possible fail points, we narrowed down the likely culprit to a BIOS failure.
Inspired by this Hackaday post, we decided to use an Arduino to flash the chip. The laptop was going to be scrapped otherwise, so we figured we might as well go all out.