- Disclaimer -
This is a writeup of my experience. It is not a “HOW-TO” guide. If you choose to apply the contents of this post, you do so at your own risk.
- Why -
I had previously configured my computer to host two operating systems: Windows 10 and Ubuntu (Linux). However, the dual boot setup is inconvenient. Only one operating system can run at a given time. To use the other, you have to restart the computer and boot into it. As such, I almost never use my Ubuntu OS. It’s just sitting there taking up valuable disk space.
- Overview -
The standard procedure to remove a Dual Boot setup (at the time of writing) seems to be this:
- Remove the Ubuntu partition
- Repair the Windows boot loader
- Step 0.1 - Save Everything -
Backup everything before proceeding. Assume the worst case scenario of bricking your disk and backup accordingly.
- Step 0.2 - Document Everything -
I strongly advice you to take photos of everything as you go along the process. They are incredibly invaluable should anything go wrong.
I took photos of the following before proceeding:
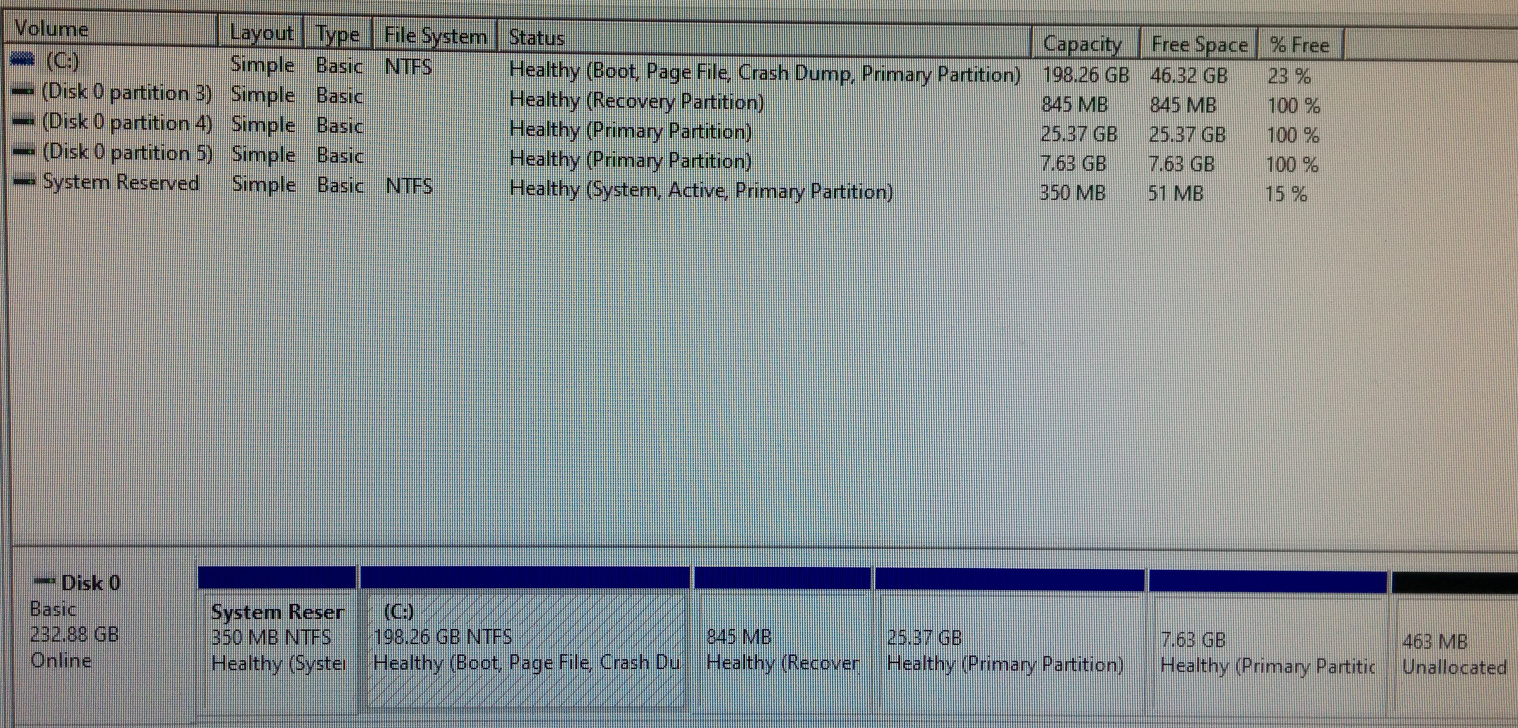
- Disk Management
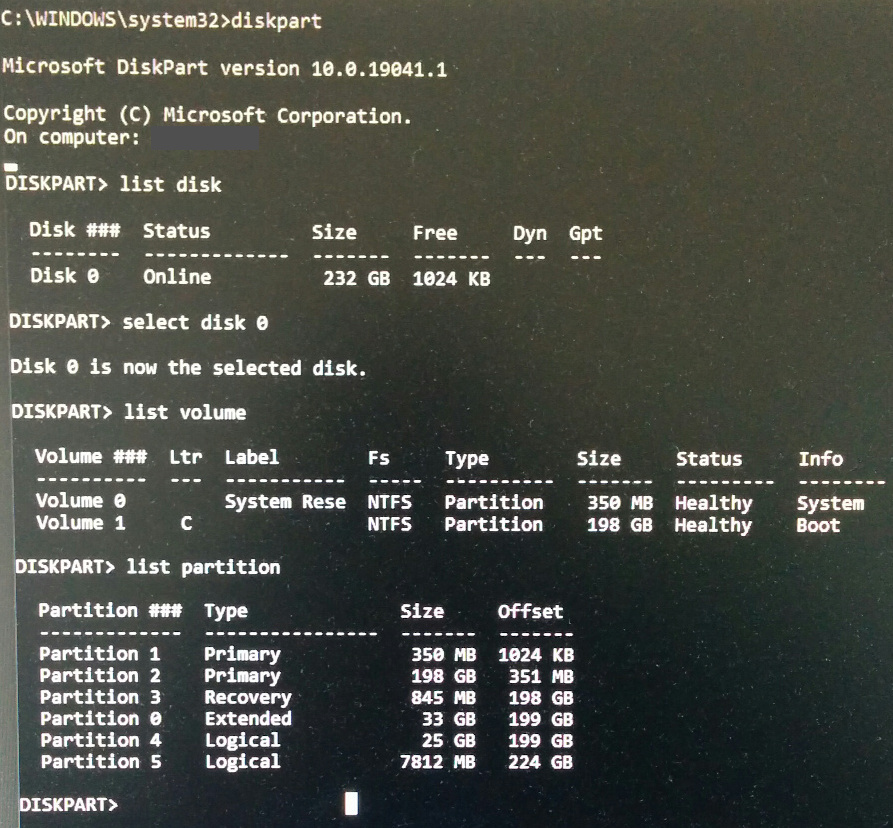
- The output of the following
diskpartcommands:
diskpart
select disc x
list volume
list partition
exit
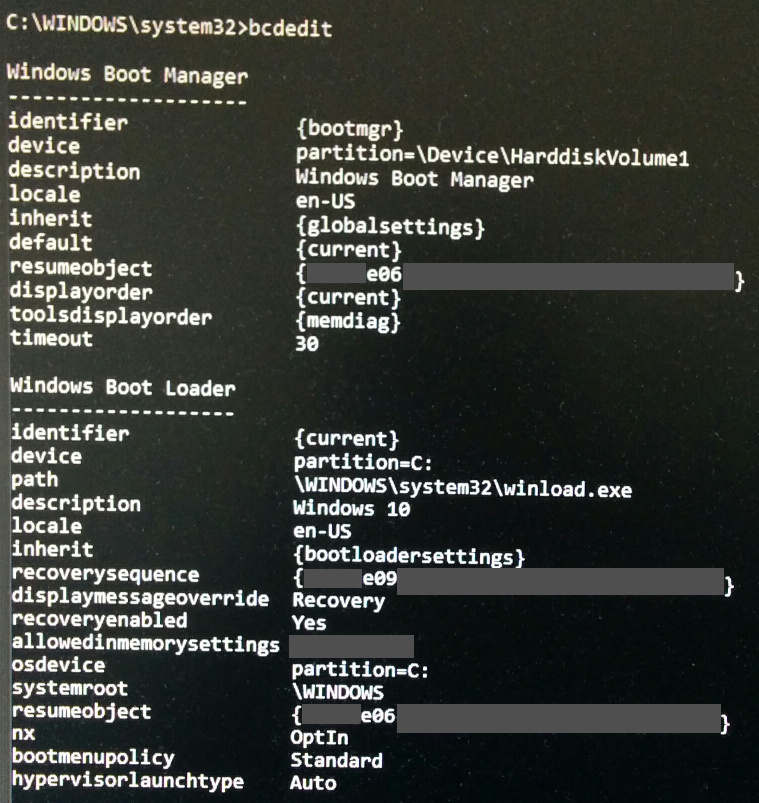
- The output of
bcdedit
- Step 0.3 - Does your computer use UEFI or BIOS -
You should also determine whether you computer uses the old BIOS (MBR) configuration, or the new UEFI (GPT) configuration. This will affect how you go about removing the Dual Boot setup.
Useful articles on this topic:
- How To Check If Your Computer Uses UEFI or BIOS
- What Is UEFI, and How Is It Different From BIOS?
- What’s the Difference Between GPT and MBR When Partitioning a Drive?
My computer uses the old BIOS (MBR) setup. As such, everything in this article applies only to this configuration.
- Step 1 - Remove Ubuntu Partitions -
The first step of removing the Ubuntu partition using Disk Management went by smoothly.
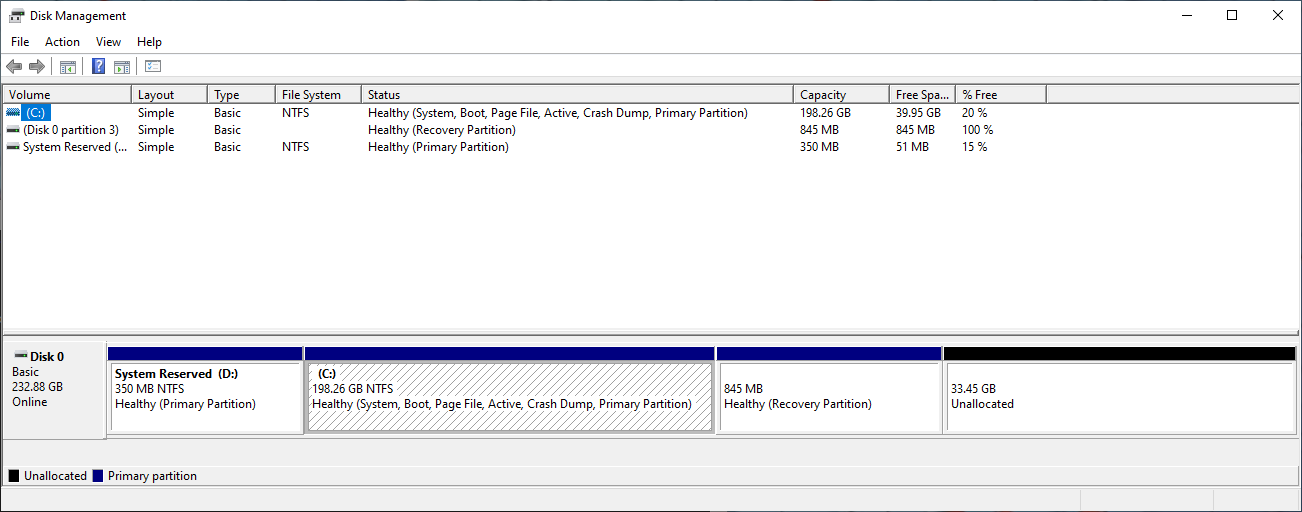
However, there is a subtle problem. My end goal is to add the freed space to my C-drive. Unfortunately in my case, a recovery partition is in the way. Disk Management can only extend a volume if the free space is immediately to the right of it:
If there's another volume in-between the unallocated space and the volume you want to extend, you can either delete the in-between volume and all files on it (make sure to back up or move any important files first!), use a non-Microsoft disk partitioning app that can move volumes without destroying data, or skip extending the volume and instead create a separate volume in the unallocated space.
I tackled this issue later (see part 3 of this series). For now, I moved on to the second step, repairing the Windows boot loader.
- Step 2 - Fix Windows Boot Loader -
To quote this article:
Linux has now been removed from your computer, but its boot loader persists. We’ll need to ... overwrite the Linux boot loader with the Windows boot loader.
The standard procedure for repairing the Windows boot loader seems to be:
- Get access to the Windows Recovery command prompt. This can be done via:
- a recovery (repair) disk
- an installation disk
- holding the
SHIFTkey as you boot into Windows
- Then run the following commands:
bootrec /fixmbrbootrec /fixbootbootrec /scanosbootrec /rebuildbcd
- Step 2.1: Get to the Recovery Command Prompt -
∙ Installation disk ∙
- If you have an installation disk, just stick it in and restart the computer.
- Eventually you will be presented with a menu that has two options: “Install Now” or “Repair Your computer”. Choose “Repair Your Computer”
- Then choose “Troubleshoot”
- Then choose “Advanced options”
- Then choose “Command Prompt”
Please see this article for more details (and pictures).
∙ Recovery disk ∙
- If you have a recovery disk, just stick it in and restart the computer.
- Eventually you will be presented with a menu that has two options: “Troubleshoot” or “Turn off your PC”. Choose “Troubleshoot”
- Then choose “Advanced options”
- Then choose “Command Prompt”
∙ Shift Key ∙
I haven’t tried this method, so I can’t say much about it. See this article for details.
- Step 2.2: Use Bootrec -
The next step is to enter the “magic” bootrec commands:
bootrec /fixmbr
bootrec /fixboot
bootrec /scanos
bootrec /rebuildbcd
∙ fixmbr ∙
From the docs:
This option writes a Windows 7 or Windows Vista-compatible MBR to the system partition. It does not overwrite the existing partition table.
If this fails, see Step 3 - Murphy.
∙ fixboot ∙
From the docs:
This option writes a new boot sector to the system partition by using a boot sector that's compatible with Windows Vista or Windows 7.
If this fails, see Step 3 - Murphy.
∙ scanos ∙
From the docs:
This option scans all disks for installations that are compatible with Windows Vista or Windows 7. It also displays the entries that are currently not in the BCD store.
If you do not see your Windows installation listed (for example in my case I should see C:\Windows), see Step 3 - Murphy.
∙ rebuildbcd ∙
From the docs:
This option scans all disks for installations that are compatible with Windows Vista or Windows 7. Additionally, it lets you select the installations that you want to add to the BCD store.
If successful, you will be asked whether you want to add your OS to the table (in my case C:\Windows). Select yes.
Note, if you see a Windows.old option, select no for it. This seems to be associated with Windows Recovery.
If rebuildbcd fails, see Step 3 - Murphy.
- Step 2.3 - Exit the Command Prompt -
- Type
exitto leave the command prompt - Then select the “Turn off your PC” option
- After your computer shuts down, unplug (or eject) the installation (or recovery) disk
- Then turn on your computer. It should boot directly to Windows (no Grub screen)
If you have successfully restored your Window’s boot loader, congratulations you are done!
For everyone else, see you in the next part of the series, where we traverse Murphy’s rabbit hole.