- Disclaimer -
This is a writeup of my experience. It is not a “HOW-TO” guide. If you choose to apply the contents of this post, you do so at your own risk.
- Step 3 - Murphy -
More likely than not, something will go wrong. What goes wrong varies widely, and likewise how to resolve it. What follows is what failed in my case, and how I got around it.
∙ No recovery or install disk ∙
I did not have a recovery disk or install disk. As such, I created a USB recovery drive as shown in this article.
∙ Scanos failed to find my Windows installation ∙
When I ran scanos it displayed:
[1]  D:\Windows
[2]  D:\Windows.old\Windows
I thought it strange that the OS was listed as being present in the D drive instead of C. However since there were no error messages, I assumed all was good and continued along.
In hindsight, this was an indication that scanos failed to find my Window’s installation (which resides in C:\Windows). What it found was what was present in my USB recovery drive.
∙ Grub rescue ∙
All was not good. When I attempted to boot the computer, I was greeted by the infamous “grub rescue” error “no such partition”.
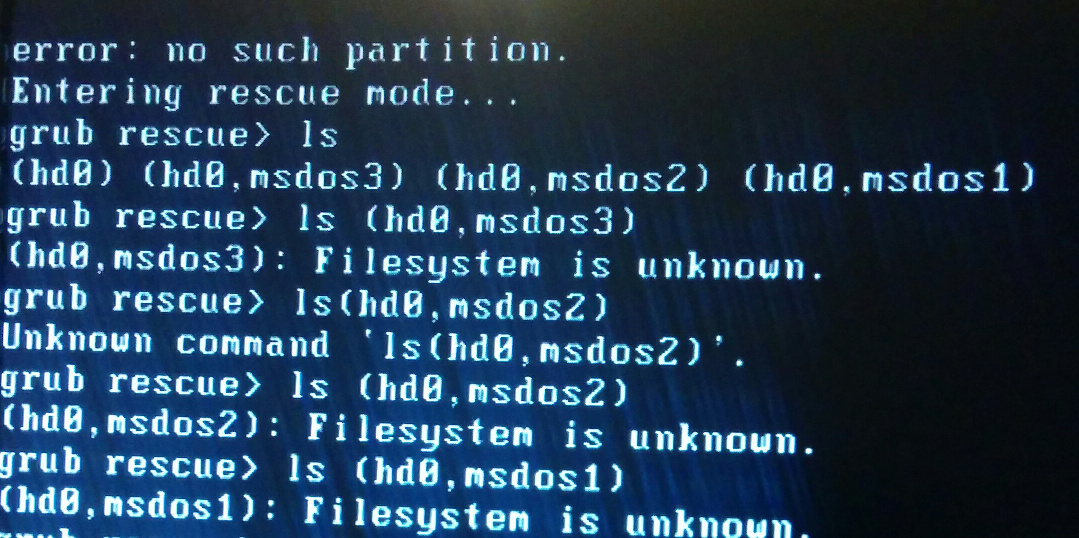
Why the heck is Grub boot loader still around? I thought I overwrote it earlier?!
In the picture, you can see my subsequent attempts to try and use Grub to boot into windows (as per this answer on Ask Ubuntu). Grub is able to see the three windows partitions on the disk (Reserved, C-drive, Recovery). However it does not know what to do with them.
Grub cannot see the old Ubuntu partitions, since I deleted them back in Step 1 - Remove Ubuntu Partitions. Part of the code Grub uses to do its job is found in the Ubuntu partition. As such, it is now useless as a boot loader.
∙ Your PC/Device needs to be repaired ∙
I attempted to get back to the command prompt using the USB recovery drive. However, I was greeted by the following lovely screen. Somehow, I had damaged the USB recovery drive?

In hindsight, I notice two things:
- the boot loader is looking for an EFI file
- the message at the bottom thinks my computer uses UEFI
This leads me to think that whatever was written into the bootloader when I used the USB recovery drive’s command prompt, assumed that my computer uses UEFI. Recall, my computer uses the old BIOS (MBR) configuration.
∙ No recovery disk (again) ∙
Without access to Windows on my computer, it was not possible to create another recovery drive.
As such, I used another computer, and the “Windows 10 Media Creation Tool” to create a USB install drive as per this article.
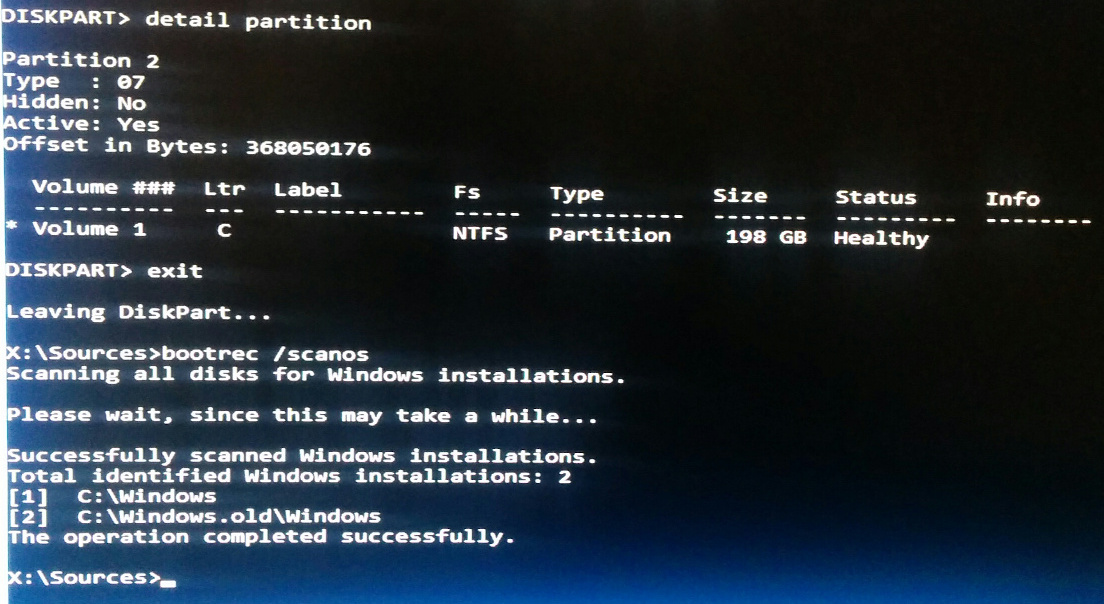
∙ Diskpart, mark active ∙
Using the USB install drive, I was able to gain access to the command prompt.
The first thing I did was mark the partition containing my Windows installation as active, as per this article.
diskpart
select disk x
select volume x
active
exit
Whether this helped or not, I cannot say. Unfortunately I did not check which partition was active before running these commands. So I do not know if the partition was already active.
To check which partition is active, you can use the detail partition command as show in this answer of Super User.
∙ Scanos, sanity check ∙
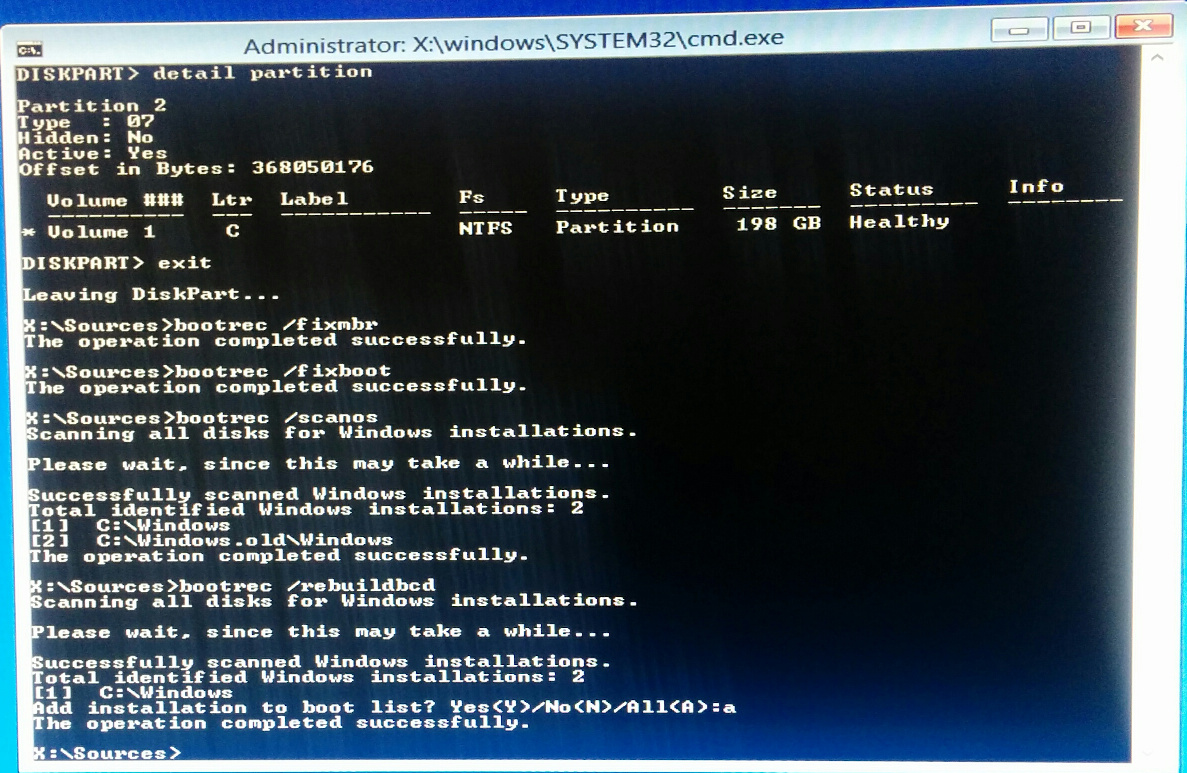
The next thing I did was run scanos. This time it was able to find my Window’s installation in C:\Windows.
∙ Fixboot, access denied ∙
However, fixboot gave me an “access denied” error. I came across this question on Super User. Of the solutions listed, this one that suggests to use a Windows 8.1 Installation disk worked for me.
∙ Creating a Windows 8.1 installation disk ∙
For Windows 8.1, an all-in-one tool for creating a bootable USB drive was no longer available from Microsoft. The support page only provides a direct download of the ISO.
To convert the ISO into a bootable USB drive, I used the tool Rufus with the following settings:
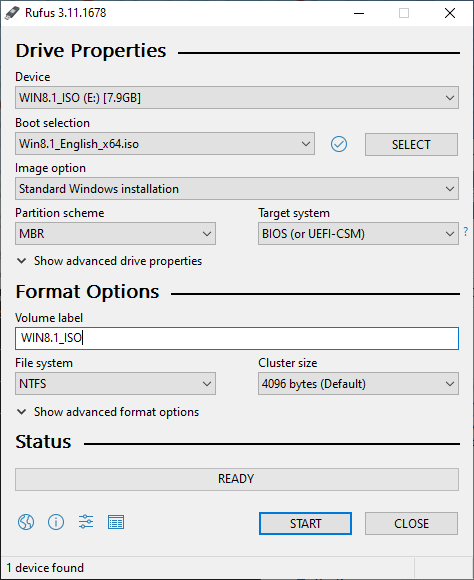
Note that for the partition scheme, I specify MBR. And for the target system, I specify BIOS.
∙ Computer fails to boot from installation disk ∙
When I started my computer, it did not automatically boot into the USB install drive. Instead, I was greeted by the old Grub rescue screen.
I suspect that this is because when Rufus creates the bootable USB, it does not insert some special data (to make the USB drive the highest priority boot device) that Microsoft’s all-in-one tool does.
However, each computer has (or should have) a way to manually specify which disk to boot from. For my computer, holding the ESC key on startup presented me with the appropriate menu.
∙ Success? ∙
Using the command prompt from the Windows 8.1 install drive, everything worked flawlessly.
Why does the Windows 8.1 installation disk work flawlessly, while both the Windows 10 repair disk, and the Windows 10 installation disk fail miserably? I do not know.
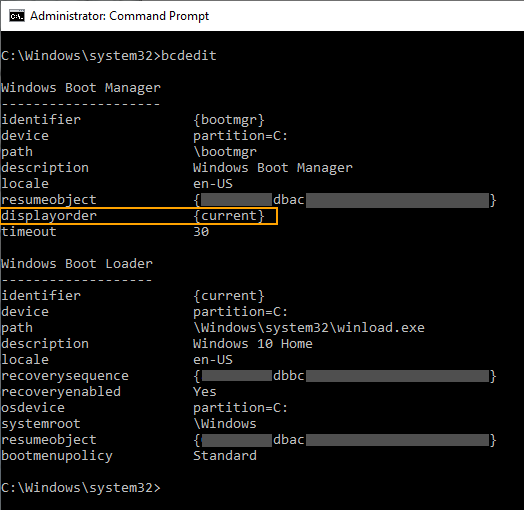
∙ Unnecessary boot entry ∙
During the rebuildbcd prompts, I said yes to C:\Windows.old\Windows. (Technically I said all, but the net effect was the same) In hindsight, I should have selected no, but at the time I did not want to take any chances. As a result, during startup, Windows prompts me to choose which of the two operating systems I want to load.
Removing the extra boot entry was painless. I followed the steps in this article.
before:

after:
∙ True success ∙
It seems removing a dual boot setup is much more work than creating one! Now that the Windows boot loader is repaired, it’s time to make use of the space I went to hell and back for. See you in the next (and final) part of this series.