I dropped my phone one too many times. This time the screen gave in and shattered.1 Whether related or not, my power button soon failed after and my phone was unable to boot. It would get about a second into the boot process before restarting again, as if the power button was constantly being pressed. The behaviour was the same even in recovery mode indicating that it was likely a hardware rather than software problem.
A Google search revealed that failure of the power button is a common problem with the Nexus 5. I tried the easy solution of partially disassembling the phone to get at the button and clean it, its rubber pad, and the surrounding area with isopropyl alcohol. Unsurprisingly, it didn’t work.
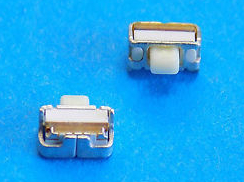
In my search, I came across this awesome article by Gregor van Egdom. It has a great explanation and photos of how this particular button works and why it likely fails. His solution is to replace the button. So I went ahead and ordered a replacement from Ebay ($5 with shipping from the US (I could have gotten it cheaper but I wanted it now rather than later as my phone was unusable)).
This article by Nick Vogt and this repair video gave me a visual idea of how I could go about removing the old button and putting the new one in.
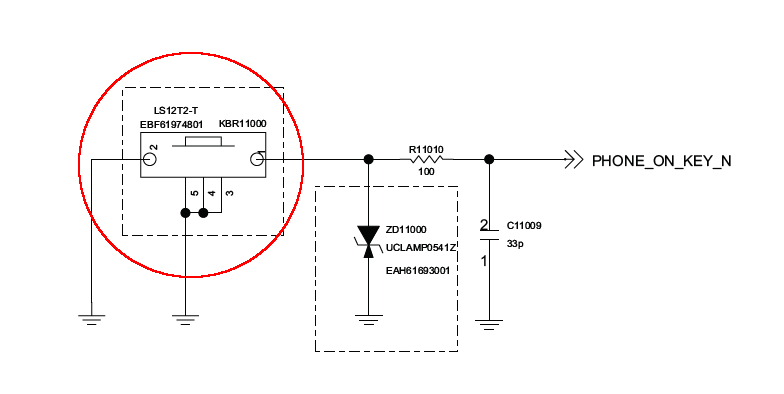
Here’s a schematic from the service manual:
And an image by Nick showing the button’s placement on the PCB:
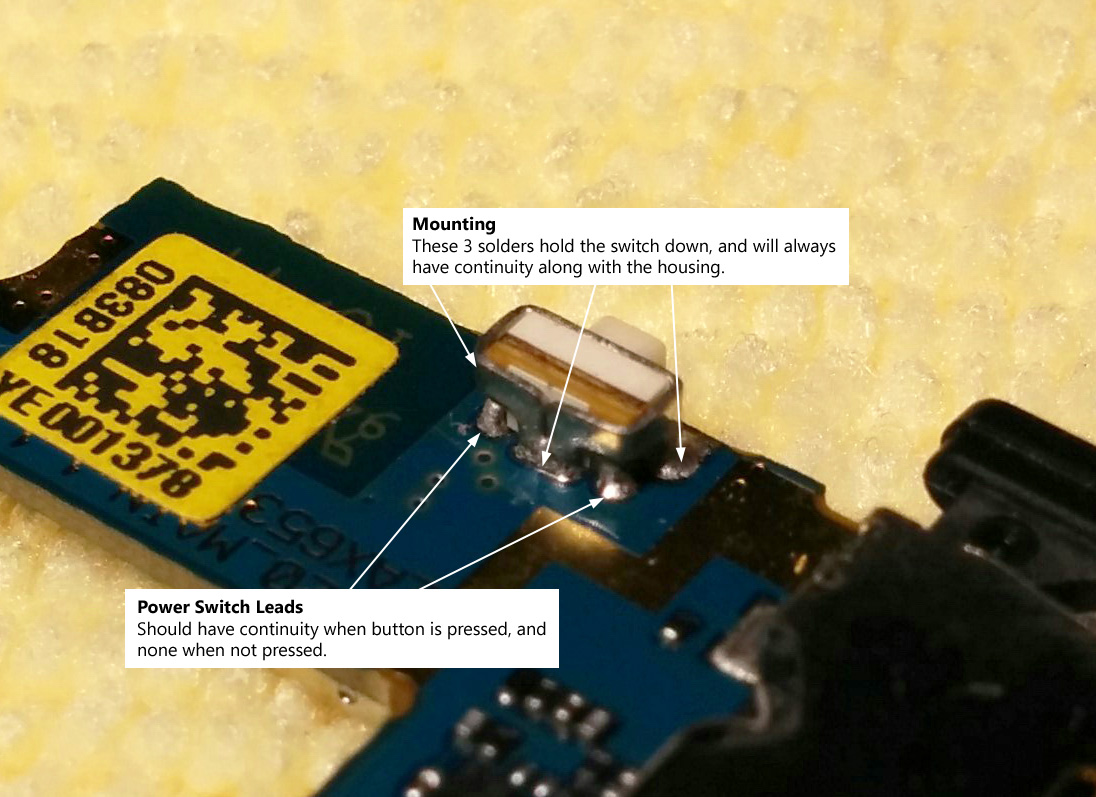
Of the five solder pads on the PCB, three secure the button to the board (pins 3,4,5 in the schematic) and two carry the signal (pins 1,2).
Tools used for the repair:
- conical solder tip (very helpful to work with the tiny button and solder pads)
- solder
- solder wick
- toothpick (angled tweezers would have been ideal)
- lots of flux
Here’s what the PCB looked like after desoldering the old button (and before cleaning the leftover solder and flux). My inexperience shows in the solder that got onto the adjacent gold trace and the remnants of solder wick braid forming a nice short among all the pins.
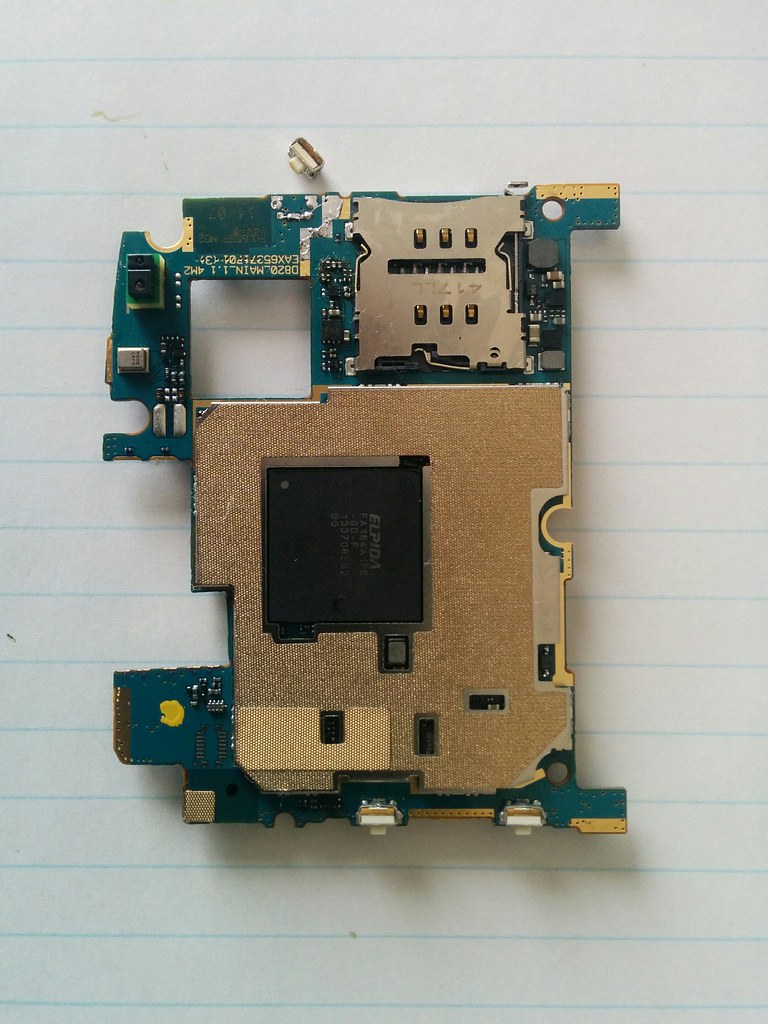
And here’s an image of the PCB after soldering in the new button:
I reassembled the phone, turned it on, and - it booted! The problem seems to be fixed! I’ll see how well the repair holds over time.
I didn’t do a proper job of documenting the disassembly of the phone. If you are curious about the Nexus 5’s innards, please see this video.
1 I ordered a replacement screen assembly from Ebay. I chose free shipping…from China (I never learn). Expect a part 2 to this repair in a few months when it finally arrives…